Learn how to sharpen a kitchen knife at home with this easy, step-by-step guide. You’ll achieve amazing results, making food prep safer and more enjoyable, even if you’re a complete beginner.
Does the thought of sharpening your kitchen knives feel a bit intimidating? You’re not alone! Many home cooks find it a bit mysterious, worrying about safety or messing up their beloved blades. But here at CookCanvas, we believe every kitchen skill should be approachable and fun. This guide will walk you through sharpening your kitchen knives at home, step by simple step, transforming your dull blades into precision tools. Get ready to discover how easy it can be to achieve amazing results and boost your kitchen confidence!
Why Sharpen Your Kitchen Knives?
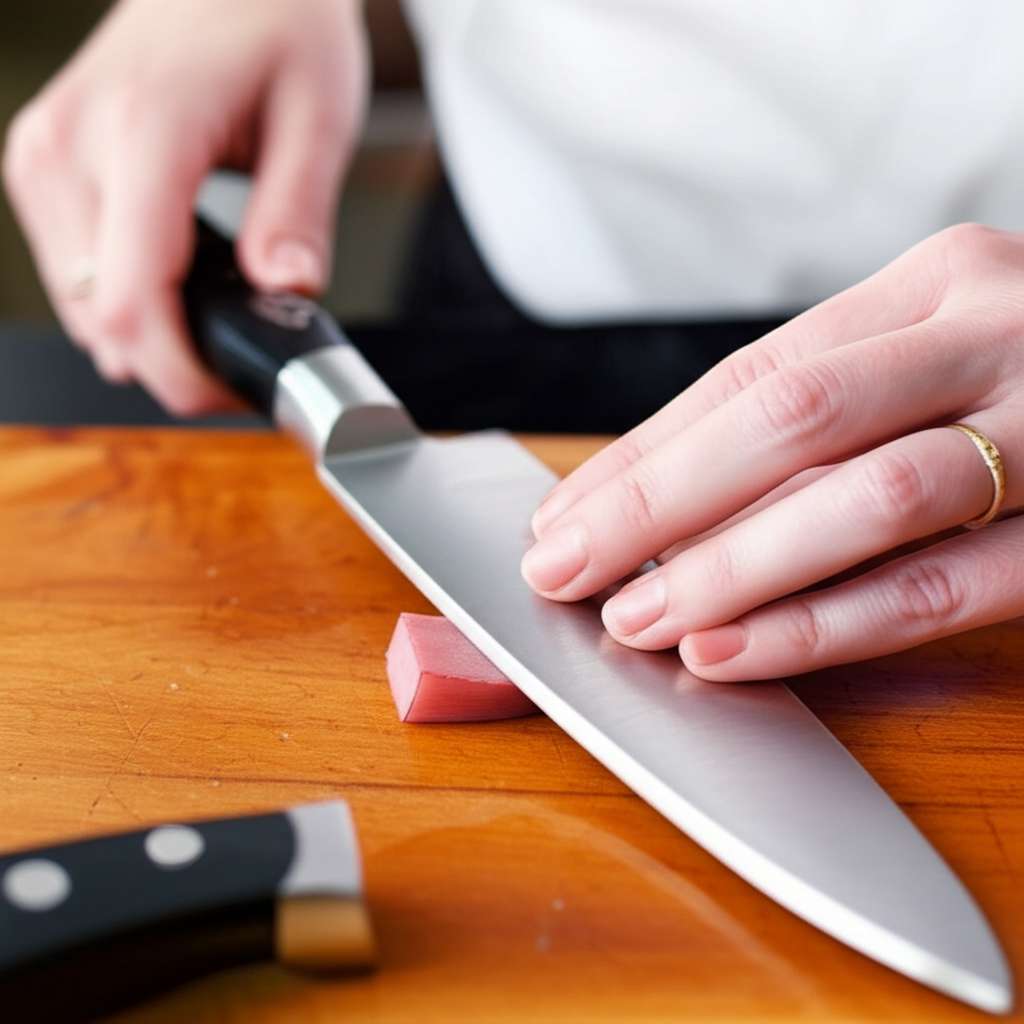
A sharp knife isn’t just about making pretty cuts; it’s about safety and efficiency. When a knife is dull, it requires more force to slice through food. This means the blade is more likely to slip, potentially causing injury. A sharp knife glides through ingredients with minimal pressure, giving you clean, precise cuts. Imagine slicing tomatoes so thin they’re almost translucent or dicing onions with ease! Sharpening your knives regularly makes cooking more enjoyable and significantly reduces the risk of accidents in the kitchen. Think of it as giving your most important kitchen tool a little spa treatment!
Essential Tools for Sharpening
You don’t need a professional setup to get your knives sharp. Here are the most common and beginner-friendly tools you can use:
- Sharpening Steel (Honing Steel): This is the most common tool found in home kitchens. It realigns the microscopic teeth of your knife’s edge, keeping it sharp between full sharpenings. It doesn’t remove metal but rather straightens the existing edge.
- Whetstone (Sharpening Stone): This is where the actual sharpening happens, by grinding away a small amount of metal to create a new, sharp edge. Whetstones come in various grits (coarseness levels). For home use, a medium-grit stone (around 1000) is a great starting point. You might also want a finer grit stone (3000-6000) for polishing.
- Electric Knife Sharpener: These are convenient and quick, often featuring slots with abrasive wheels or belts that sharpen the blade automatically. They can be very effective but offer less control than a whetstone.
- Pull-Through Sharpener: These are simple, handheld devices with V-shaped slots. You pull the knife through them. They are easy to use but can be aggressive and may not provide the best edge.
For this guide, we’ll focus on using a whetstone, as it offers the best control and results for learning the fundamental technique. If you’re using a sharpening steel, the technique is slightly different and often done before or after each use. We’ll cover that too!
Understanding Your Knife’s Edge
A knife’s edge is incredibly thin and, over time, the microscopic teeth along this edge can bend, chip, or wear down. This is what makes a knife feel dull. Sharpening aims to realign or recreate this fine edge.
Think of it like a tiny saw. When the teeth are straight and pointed, it cuts easily. When they get bent or worn down, it struggles to cut. Honing straightens these teeth, while sharpening grinds away the dull part and creates new, sharp teeth.
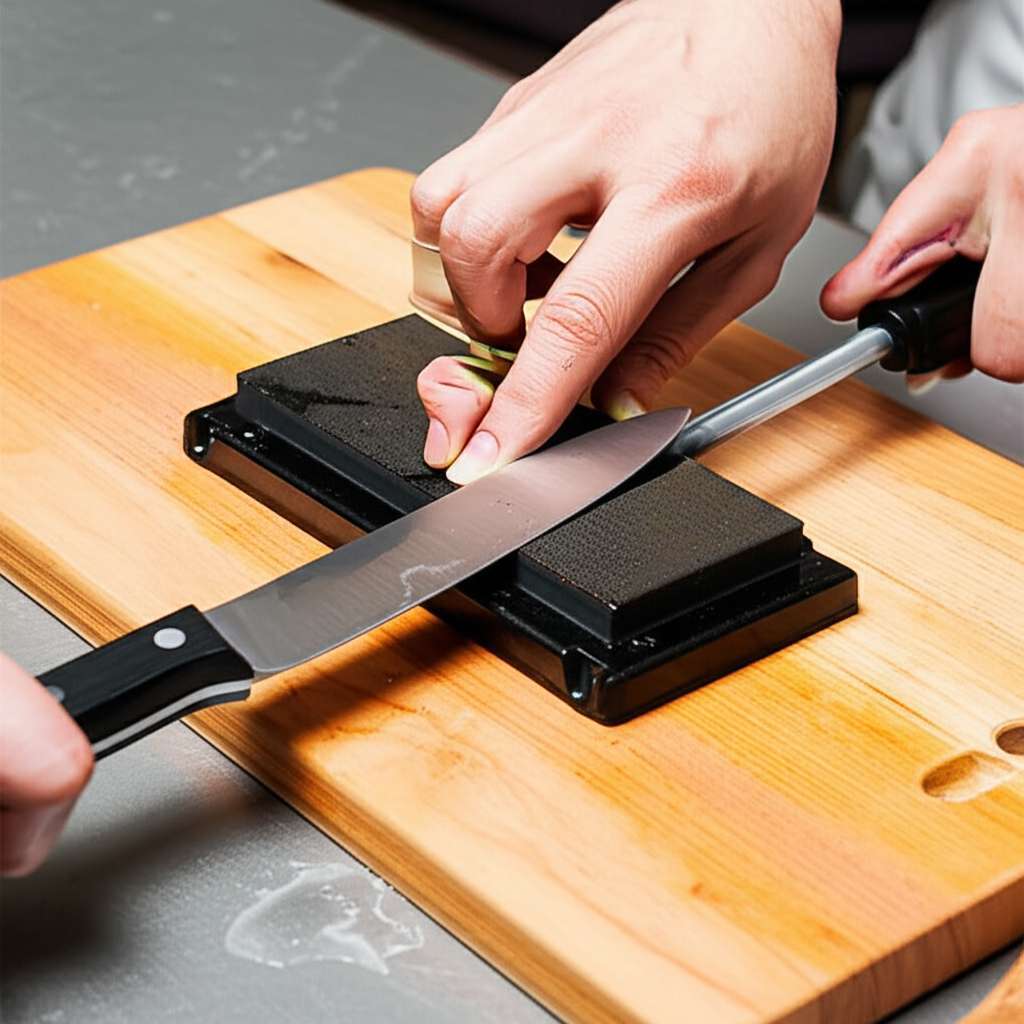
How to Sharpen a Kitchen Knife Using a Whetstone: Step-by-Step
Sharpening with a whetstone might seem daunting, but it’s a rewarding skill to learn. It gives you the most control over the angle and pressure, leading to a truly sharp and precise edge. Let’s get started!
Preparation is Key!
Before you start grinding, a little prep goes a long way. This ensures your stone is ready and you have a stable, safe workspace.
- Soak Your Whetstone (if necessary): Many whetstones are water stones and need to be soaked in water until they stop releasing air bubbles. This usually takes about 5-10 minutes. Check the manufacturer’s instructions for your specific stone. Some stones are “splash-and-go” and don’t require soaking.
- Stabilize the Stone: Whetstones can be slippery. Place a damp cloth or paper towel underneath the stone to prevent it from sliding around on your countertop. Some stones come with a base, which is even better.
- Identify Your Angles: Most kitchen knives have an edge angle between 15-20 degrees per side. To get a feel for this, try placing your knife on the stone at an angle that looks like a matchbook cover or the corner of a business card. Many sharpening guides suggest using angle guides or even chopsticks to help maintain consistency.
The Sharpening Motion
Now for the fun part! The goal here is consistent pressure and a smooth, controlled motion.
- Start with the Blade’s Heel: Place the heel of your knife (the part closest to the handle) on the stone at your chosen angle (15-20 degrees).
- Apply Gentle Pressure and Push: With your fingers lightly resting on the blade for control, push the knife forward and across the stone, as if you were trying to slice off a thin layer of the stone. As you push, move the knife along the stone so that the entire length of the edge makes contact.
- Maintain the Angle and Sweep: Continue this motion, maintaining the angle, until the blade has moved completely across the stone. Imagine you’re sweeping the entire edge of the knife across the stone.
- Repeat and “Burr” the Edge: Do this about 5-10 times on one side. You’re looking to create a “burr” – a tiny ridge of metal that forms on the opposite side of the edge. You can feel this by carefully running your fingertip away from the edge on the opposite side. You should feel a slight roughness.
- Switch Sides: Flip the knife over and repeat the same motion on the other side of the blade. Aim for the same number of strokes. This helps to remove the burr and create a balanced edge.
- Refine with Finer Grit (Optional): If you have a finer grit stone, switch to it and repeat the process with fewer strokes (3-5 per side) to polish the edge. This makes the blade even sharper and smoother.
- Stropping (Optional for Extra Sharpness): For an incredibly sharp edge, you can “strop” your knife. This involves drawing the spine of the knife (the dull, top edge) across the stone or a leather strop, moving from heel to tip, about 2-3 times per side. This polishes the edge further.
- Clean and Test: Rinse your knife thoroughly with water and dry it completely. Test its sharpness by trying to slice a piece of paper. A sharp knife should slice through paper cleanly without snagging or tearing.
Mistakes and Quick Fixes
It’s okay if your first attempt isn’t perfect! Here are common beginner hiccups and how to fix them:
- Inconsistent Angle: If your knife still feels dull or the edge is uneven, your angle probably varied. Try using an angle guide or practice holding your hand steady. Focus on keeping the spine of the knife at the same height relative to the stone throughout the stroke.
- Not Creating a Burr: If you don’t feel a burr, you might not be using enough pressure or you’re not covering the entire edge. Ensure you’re pushing firmly enough and that the entire blade from heel to tip makes contact with the stone.
- Too Much Pressure: Pressing too hard can damage the stone or the knife. Use firm but controlled pressure. Think of it as polishing a surface, not grinding concrete.
- Uneven Sharpening: If one side feels sharper than the other, you might have done more strokes or applied more pressure to one side. Try to equalize the strokes and pressure for both sides in your next session.
Honing Your Knife: The Daily Tune-Up
A honing steel (or sharpening steel) is your best friend for maintaining a sharp edge between full sharpening sessions. Honing doesn’t remove metal; it realigns the microscopic teeth on the blade’s edge that have become bent or misaligned during normal use.
How to Hone with a Steel
- Secure the Steel: Place the tip of the honing steel on a stable surface, like a cutting board or a towel-lined countertop, so it won’t slip.
- Find the Angle: Hold your knife so the heel of the blade is against the steel, at approximately a 15-20 degree angle.
- Draw Down and Across: With gentle pressure, draw the blade down the steel in a smooth, sweeping motion, from heel to tip. Imagine you are slicing a very thin layer off the steel.
- Repeat on the Other Side: Flip the knife and repeat the same motion on the other side of the steel.
- Alternate Sides: Do 5-10 strokes on each side, alternating between them.
- Test and Clean: Wipe your knife with a clean cloth. It should feel noticeably sharper and more responsive.
Pro Tip: Honing is best done before each use or at least once a day if you use your knives frequently. It takes less than a minute and makes a huge difference!
Common Knife Sharpener Types Compared
Choosing the right tool can make all the difference in your sharpening journey. Here’s a quick comparison of the most popular options:
| Sharpener Type | How it Works | Pros | Cons | Best For |
|---|---|---|---|---|
| Whetstone | Abrasive stone used with water or oil to grind and refine the blade’s edge. | Provides excellent control, achieves the sharpest edges, versatile for different grits. | Requires practice to maintain angle, can be time-consuming, stones need maintenance. | Enthusiasts, those seeking the sharpest possible edge, learning fundamental skills. |
| Electric Sharpener | Motorized abrasive wheels or belts sharpen the blade as it’s pulled through slots. | Fast, easy to use, consistent results with minimal effort. | Less control over angle, can remove too much metal if not used carefully, can be expensive. | Beginners, those short on time, maintaining a general level of sharpness. |
| Pull-Through Sharpener | V-shaped slots with abrasive materials that sharpen the blade as you pull it through. | Very simple, portable, inexpensive, quick touch-ups. | Can be aggressive, may not achieve a fine edge, can damage certain knives. | Quick fixes, basic maintenance for less expensive knives. |
| Sharpening Steel (Honing Steel) | Hard metal or ceramic rod that realigns the blade’s microscopic edge. | Quick, easy, great for daily maintenance, preserves sharpness. | Does not sharpen (only realigns), requires proper technique to avoid damaging the edge. | Daily maintenance of an already sharp knife, extending time between full sharpenings. |
Safety First!
Working with sharp objects requires respect and a calm approach. Here are crucial safety tips:
- Focus: Always pay attention to what you’re doing. Distractions can lead to accidents.
- Stable Surface: Ensure your sharpening surface (countertop, stone) is stable and won’t move.
- Grip: Use a firm but relaxed grip on your knife. Never hold the knife by the blade.
- Cut Away: Always sharpen away from your body and hands.
- Fingers: Keep your fingers away from the path of the blade. You can use your other hand to guide the spine of the knife, keeping fingers clear of the edge.
- Clean Up: Clean your knives thoroughly after sharpening to remove metal particles. Dispose of any metal filings safely.
- Storage: Store your sharp knives safely in a knife block, magnetic strip, or blade guards to protect the edges and prevent accidental cuts. For more on safe knife storage, check out guidelines from the USDA on safe food handling.
Pro Tips for Sharpening Success
- Consistency is Key: The most important aspect of sharpening is maintaining a consistent angle. Even a slight variation can prevent you from achieving a sharp edge.
- Listen to Your Stone: Pay attention to the sound. A smooth, consistent “hiss” means you’re doing it right.
- Don’t Rush: Take your time. Sharpening is a meditative process. Rushing leads to mistakes and potential injuries.
- Start with Less Aggressive Grit: If you’re new to whetstones, start with a medium grit (around 1000) and focus on technique. You can always move to finer grits later.
- Cleanliness Matters: Always clean your knife and the sharpening stone after use. Metal filings can dull your stone and contaminate your food.
- Know Your Steel: Different knives are made of different steel alloys. Some are harder and hold an edge longer but can be more brittle. Research your knives to understand their properties. For instance, high-carbon stainless steel knives offer a good balance of hardness and corrosion resistance.
Frequently Asked Questions About Knife Sharpening
How often should I sharpen my kitchen knives?
It depends on how often you use them and the quality of the steel. For most home cooks, sharpening with a whetstone every 1-3 months is sufficient. Honing with a steel should be done more frequently, perhaps before each use or daily.
Can I really sharpen my knives with just a mug or glass?
Some people use the unglazed bottom rim of a ceramic mug or glass as a makeshift sharpening surface. While it can offer a slight edge alignment in a pinch, it’s not a substitute for a proper whetstone and can be inconsistent. For best results, use dedicated sharpening tools.
What’s the difference between sharpening and honing?
Honing realigns the existing microscopic teeth of your knife’s edge, making it feel sharper. Sharpening actually removes metal to create a new, sharp edge. Think of honing as straightening bent nails and sharpening as making new nails.
How do I know if my knife is sharp enough?
A simple test is the paper test. Hold a piece of printer paper vertically and try to slice through it with your knife. A truly sharp knife will slice cleanly through the paper with minimal effort and without snagging or tearing. Another test is to slice a ripe tomato – it should cut easily without squishing.
My knife still feels dull after sharpening, what did I do wrong?
This often happens if you didn’t maintain a consistent angle, didn’t create a burr on both sides, or didn’t remove the burr properly. Try sharpening again, focusing on consistency and ensuring you feel a burr on each side before switching. If using a whetstone, ensure it was properly prepared (soaked if necessary) and is flat.
Can I sharpen serrated knives at home?
Sharpening serrated knives is a bit different. You typically need a special honing steel or a sharpening stone designed for serrations, or you might send them to a professional. For most home cooks, regular honing of straight-edged knives is the priority.
How should I store my sharpened knives?
Store your sharp knives safely to protect the edge and prevent accidents. Use a knife block, a magnetic strip on your wall, or individual blade guards. Avoid tossing them loosely into a drawer, as this can damage the blades and is dangerous.
Enjoy Your Sharp, Confident Cooking!
Mastering how to sharpen a kitchen knife at home is a game-changer. You’ve learned why it’s important, the tools you can use, and a clear, step-by-step method with a whetstone. You also know the quick daily tune-up with a honing steel. Remember, the goal isn’t perfection on your first try, but progress. Each time you sharpen your knives, you’ll get a little better, a little steadier, and a lot more confident. So go ahead, embrace this skill, and enjoy the satisfying glide of a truly sharp knife through your favorite ingredients!