
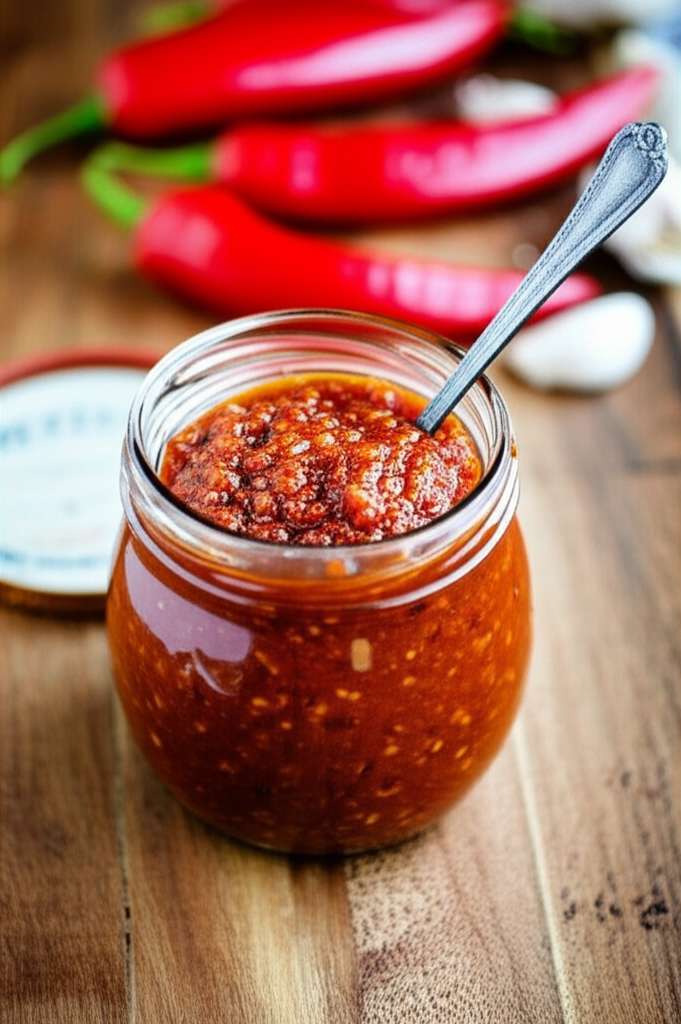
Make your own amazing chili garlic sauce at home with this simple recipe! It’s incredibly flavorful, versatile, and much fresher than store-bought versions. You’ll be adding this spicy, savory sauce to everything!
Welcome to CookCanvas! I’m Henry, and I believe that delicious food should be accessible to everyone, no matter your kitchen experience. Sometimes, those store-bought sauces just don’t have that oomph, or they have ingredients you can’t pronounce. That’s where making your own comes in!
Chili garlic sauce is one of those magical condiments that can transform a simple dish into something spectacular. Its vibrant flavor profile – a perfect balance of heat from chilies and savory depth from garlic – makes it a favorite for so many cuisines. But for beginners, the idea of making it from scratch might seem a bit daunting.
You might wonder about the best chilies to use, how to get the right consistency, or even how to store it safely. Don’t worry, I’ve got you covered! We’ll go through this step-by-step, demystifying the process so you can create your own amazing chili garlic sauce with confidence.
Get ready to unlock a world of flavor right in your own kitchen. We’ll start with what you’ll need and then dive into the easy-to-follow method that will have you enjoying this fantastic sauce in no time!
Why Make Your Own Chili Garlic Sauce?
There’s a certain satisfaction that comes with creating a staple condiment yourself. For chili garlic sauce, the benefits are truly compelling, especially for those of us who love bold flavors but prefer simple, wholesome ingredients.
Store-bought options often contain preservatives, artificial colors, or excessive amounts of sugar and sodium. When you make it at home, you’re in complete control of what goes into your sauce. This means you can tailor the spice level, the garlic intensity, and the overall flavor to your exact preferences.
Plus, the freshness you achieve by using ripe chilies and fragrant garlic is unparalleled. It’s a difference you can taste in every spoonful. Imagine drizzling a homemade sauce that bursts with genuine flavor onto your favorite dishes – it’s a game-changer!
The Magic Ingredients: What You’ll Need
Gathering your ingredients is the first exciting step in our chili garlic sauce adventure. Don’t let the list overwhelm you; these are mostly common items you might even have in your pantry already! We’re focusing on fresh, vibrant flavors.
Fresh Chilies
The heart of our chili garlic sauce! The type of chili you choose will significantly impact the heat and flavor. For a balanced heat and great color, a mix is often best.
- Red Chilies: For a beautiful color and moderate heat. Options include Fresno, red jalapeños, or even milder Anaheim peppers if you prefer less spice.
- Bird’s Eye Chilies: If you like it hotter, a few bird’s eye chilies will add a significant kick. Use sparingly if you’re new to spicy foods!
- Optional: Dried Red Chilies: A small handful of dried chilies (like arbol or Korean gochugaru) can add a different layer of smoky depth, but fresh is wonderful too.
Garlic
Fresh garlic is non-negotiable for that punchy, savory aroma and taste. We’ll be using a generous amount!
- Fresh Garlic Cloves: Aim for about 1-2 heads of garlic. The more garlic, the richer the flavor!
Other Flavor Boosters
These ingredients round out the flavor profile, adding complexity and balance.

- Neutral Oil: Such as vegetable, canola, or sunflower oil. This helps cook the ingredients and creates the sauce’s base.
- Vinegar: Rice vinegar is a great choice for its mild, slightly sweet profile. Apple cider vinegar or white wine vinegar can also work.
- Sugar: A touch of sugar balances the heat and acidity. White sugar, brown sugar, or even a bit of honey can be used.
- Salt: Essential for enhancing all the other flavors.
- Optional: Soy Sauce or Fish Sauce: For an extra layer of umami, especially if you’re aiming for an Asian-inspired flavor.
- Optional: Ginger: A small piece of fresh ginger can add a wonderful zesty note.
Essential Tools for Your Chili Garlic Sauce Creation
Having the right tools makes the cooking process smoother and more enjoyable. For this recipe, we’re keeping it simple and using common kitchen equipment.
- Cutting Board: For prepping your chilies and garlic.
- Sharp Knife: Essential for safely chopping ingredients.
- Food Processor or Blender: This is key for achieving the right texture for your sauce. If you don’t have one, a mortar and pestle can work for a chunkier texture, or you can chop very finely by hand.
- Medium Saucepan: For gently cooking the ingredients.
- Spatula or Spoon: For stirring.
- Airtight Jars or Containers: For storing your finished sauce.
- Gloves (Optional but Recommended): Chili oils can irritate your skin and eyes, so wearing gloves while handling chilies is a good idea!
Step-by-Step: Crafting Your Amazing Chili Garlic Sauce
Now for the fun part! We’ll break down the process into simple, manageable steps. Each step is designed to build flavor and achieve that perfect saucy consistency.
Step 1: Prepare Your Chilies and Garlic
This is where we get our flavor base ready. Safety first – if you’re sensitive, wear gloves when handling chilies!
Wash your fresh chilies thoroughly. Remove the stems. For a milder sauce, you can remove the seeds and membranes, which contain most of the heat. If you like it spicy, leave some or all of them in! Chop the chilies roughly.
Peel your garlic cloves. You can give them a rough chop too, especially if you’re using a food processor. If you’re using fresh ginger, peel and roughly chop that as well.
Step 2: Process the Ingredients
This is where we start turning our fresh ingredients into a paste. Texture is key here!
Place the chopped chilies, garlic, and ginger (if using) into your food processor or blender. Pulse until you achieve a coarse paste. Be careful not to over-process into a liquid; we want some texture, like a thick relish.
If you prefer a smoother sauce, you can process it longer. For a chunkier sauce, stop pulsing sooner. You can also achieve a finer texture by finely mincing everything by hand, but this takes more time and effort.
Step 3: Cook the Sauce Base
Gently cooking our chili-garlic mixture melds the flavors and removes the raw edge, creating a more complex taste.
Heat your neutral oil in a medium saucepan over medium-low heat. Add the chili-garlic paste. Stir constantly to prevent it from sticking and burning. We want to gently sauté it until it becomes fragrant and the raw smell of garlic disappears, usually about 5-7 minutes.
This slow cooking is crucial for developing the deep flavor profile of your chili garlic sauce. Keep the heat low to avoid burning the garlic, which can turn bitter.
Step 4: Add Liquids and Seasonings
Now we bring everything together to create the signature sauce consistency and balance the flavors.
Pour in your vinegar, sugar, and salt. If you’re using soy sauce or fish sauce, add it now too. Stir everything well to combine. Bring the mixture to a gentle simmer.
Let it simmer for about 10-15 minutes, stirring occasionally. This allows the flavors to meld beautifully and the sauce to thicken slightly. The sugar will dissolve, and the vinegar’s sharp edge will mellow.
Step 5: Cool and Store
Patience is key here! Letting the sauce cool properly ensures the best texture and flavor.
Once the sauce has simmered and thickened to your liking, remove it from the heat. Let it cool completely in the saucepan. As it cools, it will thicken further. If it becomes too thick, you can stir in a tablespoon or two of warm water or vinegar.
Once cooled, transfer your homemade chili garlic sauce into clean, airtight jars or containers. Store it in the refrigerator. It should keep well for several weeks, offering you a burst of flavor whenever you need it!
Tips for Customizing Your Chili Garlic Sauce
One of the best things about making your own chili garlic sauce is its adaptability. You can tweak it to perfectly suit your taste buds and what you have on hand!
Adjusting the Heat
The spice level is entirely up to you. If you find your initial batch too spicy, you can dilute it with more oil or vinegar in your next attempt, or even add a bit more of a milder pepper like bell pepper to the blend.
Conversely, if you crave more heat, don’t hesitate to add more bird’s eye chilies or even a touch of chili flakes during the cooking process. Experimenting with different types of fresh chilies can also yield varied heat profiles.
Flavor Variations
Want to add a smoky depth? Try adding a pinch of smoked paprika or a few rehydrated dried chilies that have been sautéed. A little bit of toasted sesame oil added at the end of cooking can impart a wonderful nutty aroma.
For an extra umami boost, consider adding a teaspoon of mushroom powder or a splash of vegetarian oyster sauce. A squeeze of lime juice right before serving can add a bright, fresh finish.
Texture Preferences
If you prefer a smoother sauce, you can blend it for longer or even strain some of the larger chili skins out after processing. For a more rustic, chunky sauce, simply pulse the ingredients less in the food processor and leave some larger pieces.
Some people like to add a small amount of cornstarch slurry (cornstarch mixed with water) at the end of simmering if they want a thicker, more jelly-like consistency, though this is usually not necessary if cooked down properly.
Ingredient Substitution Guide
Life happens, and sometimes you might be missing a specific ingredient. Don’t let that stop you! Here are some common substitutions that will still yield a delicious chili garlic sauce.
| Original Ingredient | Suggested Substitution | Notes |
|---|---|---|
| Fresh Red Chilies (e.g., Fresno) | A mix of red bell pepper and a hotter chili (like jalapeño or serrano) | Bell pepper adds color and bulk; adjust hot chili amount for desired heat. |
| Rice Vinegar | White wine vinegar or apple cider vinegar | These will add a slightly different tanginess but work well. |
| White Sugar | Brown sugar, honey, or maple syrup | These will add a slightly different flavor profile and color. Adjust sweetness as needed. |
| Neutral Oil (Vegetable, Canola) | Grapeseed oil, avocado oil, or light olive oil | Avoid strong-flavored oils like extra virgin olive oil or coconut oil. |
| Fresh Garlic | Pre-minced garlic or garlic powder (use sparingly) | Fresh is always best for flavor, but these can work in a pinch. Adjust quantity for garlic powder. |
A Note on Food Safety
When making homemade condiments, especially those with garlic and chilies, it’s important to consider food safety. Proper storage is key to preventing spoilage and ensuring your delicious sauce is safe to eat.
Garlic and chilies, when stored in oil at room temperature, can create an environment where Clostridium botulinum, the bacteria that causes botulism, can grow. Botulism is a rare but serious illness. For this reason, it’s crucial to refrigerate your homemade chili garlic sauce immediately after it has cooled.
According to the FDA, homemade garlic-in-oil mixtures, including those with herbs or chilies, should be refrigerated and used within a short period. For best results and safety, consume your refrigerated chili garlic sauce within 3-4 weeks. If you notice any off smells, mold, or changes in appearance, discard it immediately.
For more detailed information on food safety, you can refer to the U.S. Food and Drug Administration (FDA) guidelines on home food preservation.
Frequently Asked Questions (FAQ)
It’s normal to have questions when trying a new recipe. Here are some common ones to help you on your chili garlic sauce journey!
Q1: How do I make the sauce less spicy?
To reduce spiciness, remove the seeds and membranes from your chilies before chopping them, as this is where most of the capsaicin (the heat compound) resides. You can also use milder chili varieties or balance the heat with more sugar and vinegar.
Q2: My sauce seems too thick/thin. How can I fix it?
If your sauce is too thick, you can thin it out by stirring in a tablespoon of warm water or vinegar at a time until it reaches your desired consistency. If it’s too thin, simmer it uncovered for a few more minutes to allow some of the liquid to evaporate and the sauce to reduce.
Q3: How long does homemade chili garlic sauce last?
When stored properly in an airtight container in the refrigerator, your homemade chili garlic sauce should last for about 3-4 weeks. Always check for any signs of spoilage before using.
Q4: Can I use dried chilies instead of fresh ones?
Yes, you can! If using dried chilies, you’ll need to rehydrate them first by soaking them in hot water for about 15-20 minutes. Drain them well before adding them to the food processor with the garlic. The flavor profile will be slightly different, often with a smokier note.
Q5: What’s the best way to store it?
Store your chili garlic sauce in clean, dry, airtight jars or containers. Refrigeration is essential for safety and preservation. Ensure that the sauce is fully cooled before sealing the containers and placing them in the fridge.
Q6: Can I add other vegetables?
Absolutely! You can experiment with adding a small piece of fresh ginger for a zesty kick, or even a bit of shallot along with the garlic for added sweetness and depth. Just remember to process them with the chilies and garlic.
Q7: My sauce has separated. Is that okay?
A little separation can happen over time, especially if you used a lot of oil. This is usually normal. Just give the sauce a good stir before each use to recombine the ingredients. If you notice any fuzzy mold or an off smell, however, it’s best to discard it.
Conclusion: Your Flavor Journey Begins!
And there you have it! You’ve just learned how to create your very own amazing chili garlic sauce right in your kitchen. See? It wasn’t so complicated after all! From selecting fresh ingredients to the gentle simmer that melds all those wonderful flavors, you’ve got the power to transform simple chilies and garlic into a gourmet condiment.
This versatile sauce is your new best friend for adding a kick to stir-fries, marinades, dips, eggs, noodles, and so much more. The ability to customize the heat and flavor means it will always be exactly how you like it. Remember, cooking is an adventure, and mastering this chili garlic sauce recipe is a fantastic step in your culinary journey.
Don’t be afraid to experiment with the ingredients and find your perfect balance. The joy of homemade food is in its personal touch. So, go ahead, give this recipe a try, and get ready to impress yourself (and anyone lucky enough to share your delicious creations) with the incredible flavor you’ve unlocked. Happy cooking!