
Whip up an amazing flavor blast with this easy chili sauce recipe! Perfect for beginners, it transforms simple ingredients into a versatile condiment that adds a delightful kick to any dish.
Making your own chili sauce at home might sound a little intimidating at first, but it’s actually super simple! Many store-bought versions have ingredients we can’t even pronounce, and they often lack that fresh, vibrant taste. You might be wondering if you need fancy equipment or a lot of cooking experience to make a delicious chili sauce. Don’t worry, that’s where CookCanvas comes in!
Today, we’re going to walk through a fantastic chili sauce recipe that’s packed with amazing flavor. It’s designed with you in mind, breaking down every step so you can feel confident and proud of your creation. Get ready to impress yourself and anyone you share it with!
Let’s dive in and create a chili sauce that will be your new go-to for adding that perfect zing!
Why Homemade Chili Sauce is a Game-Changer
Have you ever tasted a chili sauce that was just… meh? It’s a common kitchen struggle! Store-bought sauces can sometimes taste artificial or overly processed, missing that satisfying depth of flavor that truly homemade food offers. You might be looking for a way to add a little excitement to your meals without a lot of fuss.
The beauty of making your own chili sauce is that you control exactly what goes into it. You can adjust the spice level, the sweetness, and the tanginess to perfectly suit your taste buds. Plus, the aroma that fills your kitchen as it simmers is simply wonderful!
This recipe is designed to be incredibly straightforward. We’ll use readily available ingredients and simple techniques to ensure you get a delicious result, no matter your cooking experience. You’ll learn how to balance flavors and achieve that perfect chili sauce consistency.
Gather Your Flavor-Boosting Ingredients
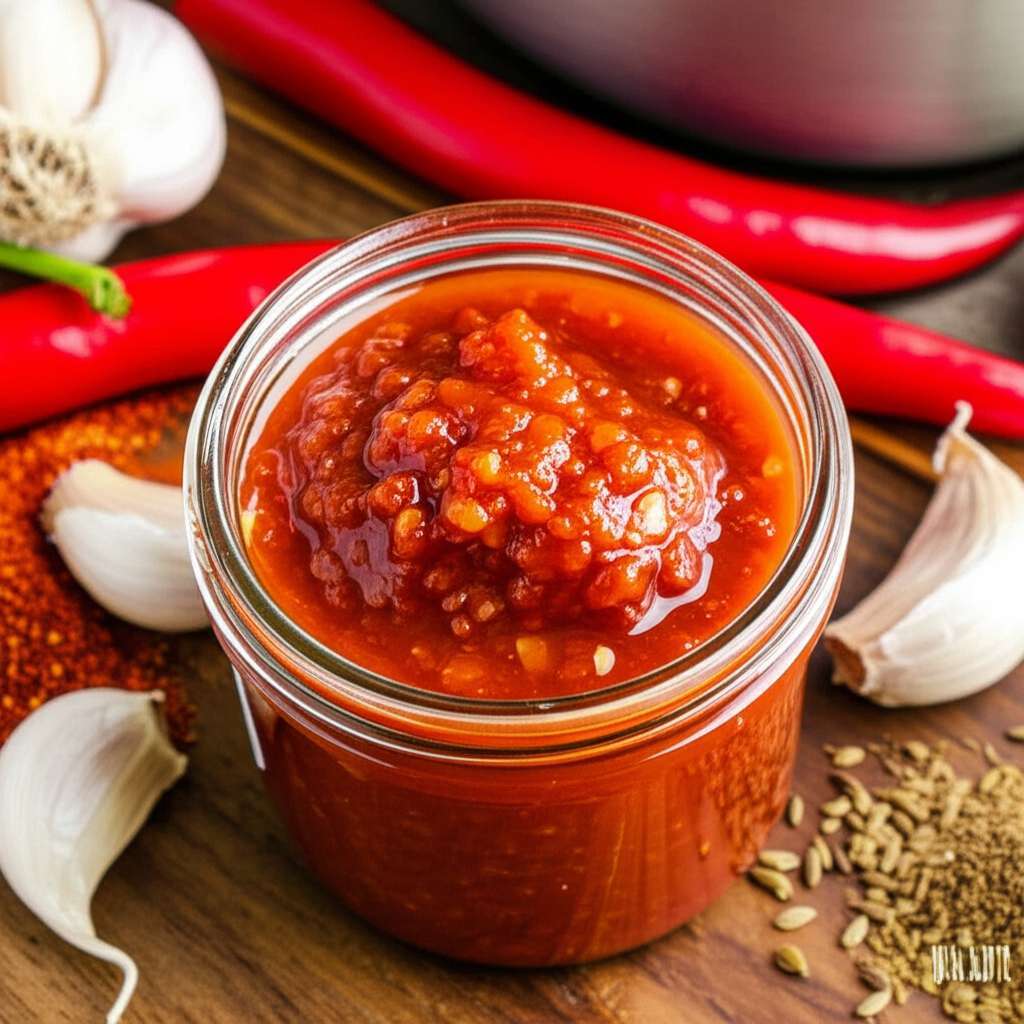
The magic of a great chili sauce starts with fresh, quality ingredients. For our amazing flavor blast, we’ll be using a combination of chilies, aromatics, and a touch of sweetness and acidity. Don’t be shy with these – they’re what give our sauce its personality!
Here’s what you’ll need to get started on your chili sauce adventure:
- 1 pound fresh red chilies (like Fresno, Serrano, or a mix for varied heat)
- 4 cloves garlic, peeled
- 1 inch piece of fresh ginger, peeled and roughly chopped
- 1/2 cup white vinegar
- 1/4 cup water
- 2 tablespoons granulated sugar (or honey for a natural sweetness)
- 1 teaspoon salt
- Optional: 1/2 teaspoon red pepper flakes for extra heat
Choosing your chilies is part of the fun! If you’re new to spice, start with milder chilies like Fresno or even some red bell peppers mixed in for color and flavor without too much heat. For a hotter sauce, incorporate Serrano peppers. Remember to wear gloves when handling chilies to protect your hands.
Essential Tools for Your Chili Sauce Creation
You don’t need a professional kitchen to make this chili sauce. A few basic tools you likely already have will do the trick. Having everything ready before you start cooking makes the process smooth and enjoyable.
Here are the simple tools that will help you create your flavor blast:
- Cutting board
- Sharp knife
- Measuring cups and spoons
- Small saucepan
- Blender or food processor (an immersion blender also works well)
- Airtight storage container or jars
A good, sharp knife makes chopping a breeze. And having a reliable blender or food processor is key for achieving that smooth, saucy texture we’re aiming for. Don’t have a high-powered blender? No worries! You can pulse carefully or even finely mince everything by hand for a more rustic texture.
Step-by-Step: Crafting Your Amazing Chili Sauce
Now for the exciting part – actually making the sauce! We’ll take this step by step, so you can follow along with ease. Each stage is designed to build on the last, creating layers of delicious flavor.
Step 1: Prepare Your Chilies
First things first, let’s get those chilies ready. Wash them thoroughly under cool water. Remove the stems. You can leave the seeds in for more heat, or remove them if you prefer a milder sauce. For a smoother sauce, you might want to remove some of the seeds and membranes, as this is where a lot of the heat resides.
Finely chop the chilies. If you’re using a blender or food processor, you can chop them a bit more coarsely, as the machine will do the fine work. Remember to be careful with chili oils – they can irritate your skin and eyes, so wearing gloves is a good idea.
Step 2: Sauté the Aromatics
In your small saucepan, add a tablespoon of neutral oil (like vegetable or canola oil) and heat it over medium heat. Add your chopped garlic and ginger. Sauté them for about 1-2 minutes until they become fragrant. Be careful not to burn the garlic, as this can make it taste bitter.
This step is crucial for unlocking the wonderful aromas and flavors of the garlic and ginger. It creates a delicious base for our chili sauce. Once they’re fragrant, add your chopped chilies to the saucepan.
Step 3: Simmer and Soften
Stir the chilies into the garlic and ginger mixture. Let them cook for about 5 minutes, stirring occasionally, until they start to soften. This process helps to mellow out some of the raw chili flavor and makes them easier to blend later on.
Now, pour in the white vinegar and water. Add the sugar (or honey) and salt. Stir everything together well to dissolve the sugar and salt. If you’re adding extra red pepper flakes for more heat, toss them in now.
Step 4: Bring to a Gentle Simmer
Bring the mixture to a gentle simmer. Once it’s simmering, reduce the heat to low, cover the saucepan, and let it cook for about 15-20 minutes. This simmering time allows all the flavors to meld together beautifully and for the chilies to become very tender.
The liquid will reduce slightly, concentrating the flavors. You’ll notice the wonderful aroma filling your kitchen – that’s the sign of a delicious sauce in the making!
Step 5: Blend to Perfection
Carefully transfer the cooked chili mixture to your blender or food processor. Make sure the mixture has cooled slightly before blending, especially if using a standard blender, to avoid steam buildup. If using an immersion blender, you can blend directly in the saucepan.
Blend the mixture until it reaches your desired consistency. For a very smooth sauce, blend for a longer time. If you prefer a bit of texture, blend for less time. You can add a tiny bit more water or vinegar if it’s too thick, or a pinch more sugar if it needs balancing.
Step 6: Cool and Store
Once blended, taste your chili sauce and adjust seasonings if needed. You might want a little more salt, sweetness, or a touch more vinegar for tang. Let the sauce cool completely in the saucepan or a bowl. This allows the flavors to settle and deepen.
Pour the cooled chili sauce into clean, airtight jars or containers. It will keep in the refrigerator for about 2-3 weeks. Proper storage ensures you have this amazing flavor blast ready whenever you need it!
Tips for Customizing Your Chili Sauce
This recipe is a fantastic starting point, but the real fun comes from making it your own! Chili sauce is incredibly versatile, and a few small tweaks can lead to entirely new flavor profiles. Don’t be afraid to experiment – that’s how you discover your personal favorites!
Here are some ideas to get your creative juices flowing:
- Spice Level: Adjust the types and quantity of chilies. For less heat, remove seeds and membranes or use milder peppers. For more heat, add hotter chilies like Habaneros (handle with extreme care!) or increase the red pepper flakes.
- Sweetness: Experiment with different sweeteners. Maple syrup, agave nectar, or brown sugar can add unique undertones. Adjust the amount to your preference.
- Acidity: Try different types of vinegar like rice vinegar, apple cider vinegar, or even a splash of lime juice for a brighter, zesty flavor.
- Aromatics: Add a pinch of ground spices like cumin, coriander, or even a tiny bit of cinnamon for warmth and depth. A sprig of fresh cilantro or a few basil leaves added during the blending stage can also be delicious.
- Texture: If you like a chunkier sauce, pulse the mixture instead of blending until smooth. You can also leave some of the softened chilies whole or roughly chopped.
Remember, cooking is all about what tastes good to you. These suggestions are just starting points. The best way to learn is to try them out and see what delicious combinations you come up with.
Ingredient Substitutions and Variations
Sometimes you might be missing an ingredient or just want to try something a little different. That’s perfectly okay! Here’s a quick guide to some common substitutions and variations you can use for your chili sauce recipe.
| Ingredient | Substitution Options | Notes |
|---|---|---|
| Fresh Chilies | Dried chilies (rehydrated), chili powder (use sparingly) | Dried chilies will yield a different flavor profile. Adjust rehydration time and powder amount carefully. |
| Garlic | Garlic powder (1/4 tsp per clove) | Fresh garlic provides a more robust flavor. Powder is a quick substitute. |
| Ginger | Ground ginger (1/4 tsp per inch) | Fresh ginger has a brighter, zestier flavor. Ground ginger is more pungent. |
| White Vinegar | Apple cider vinegar, rice vinegar, red wine vinegar | Each vinegar will impart a slightly different tang. |
| Granulated Sugar | Honey, maple syrup, agave nectar, brown sugar | These sweeteners will add their own subtle flavors. |
When substituting, always taste as you go and adjust accordingly. The goal is to maintain a balance of flavors – sweet, sour, salty, and spicy.
Understanding Chili Heat and Safety
Chilies are fantastic for adding flavor and heat, but it’s important to handle them with care. The heat in chilies comes from compounds called capsaicinoids, with capsaicin being the most prominent. Different chili peppers have vastly different heat levels, measured in Scoville Heat Units (SHU).
For reference, a bell pepper has 0 SHU, a Jalapeño is around 2,500-8,000 SHU, and a Habanero can be 100,000-350,000 SHU. When working with chilies, especially hotter varieties, it’s a good practice to wear gloves to prevent skin irritation. Avoid touching your eyes or face after handling chilies.
If you accidentally get chili oil on your skin, wash it thoroughly with soap and cold water. Dairy products like milk or yogurt can help neutralize the burning sensation, as capsaicin is fat-soluble. For more detailed information on food safety, including handling peppers, the U.S. Food and Drug Administration (FDA) offers comprehensive guidelines.
How Long Will My Chili Sauce Last?
Proper storage is key to enjoying your homemade chili sauce for as long as possible. Because it contains vinegar, which is a natural preservative, your chili sauce should have a decent shelf life.
For the best quality and safety, store your chili sauce in clean, airtight containers in the refrigerator. It should typically last for 2 to 3 weeks. Always check for any signs of spoilage, such as off odors, mold, or changes in texture, before consuming.
If you want to store it for longer periods, you can consider freezing it in small portions or even canning it, though canning requires specific sterilization and processing techniques to ensure safety. For most home cooks, the refrigerator is the best and easiest storage method for this recipe.
Frequently Asked Questions About Chili Sauce
Got questions? That’s completely normal when you’re trying a new recipe! Here are some common queries beginners have about making chili sauce.
Q1: My chili sauce is too spicy! What can I do?
Don’t worry, you can often tame the heat! You can try adding more sweetener (sugar, honey) and a bit more vinegar to balance the spice. Blending in a mild ingredient like a roasted red bell pepper or a spoonful of tomato paste can also help dilute the heat. For future batches, use fewer hot chilies or remove more seeds and membranes.
Q2: My chili sauce is too thin. How can I thicken it?
The easiest way to thicken it is to simmer it uncovered for a bit longer. This allows excess liquid to evaporate, concentrating the sauce. You can also create a slurry by mixing a teaspoon of cornstarch with a tablespoon of cold water, then stirring it into the simmering sauce until it thickens. Be sure to cook it for a minute after adding cornstarch to remove any starchy taste.
Q3: Can I use dried chilies instead of fresh ones?
Yes, you can! You’ll need to rehydrate them first. Soak about 1/2 cup of dried chilies in hot water for about 20-30 minutes until softened. Drain them (reserving some of the soaking liquid for flavor) and then proceed with the recipe, adding the rehydrated chilies to the saucepan. You might need to adjust the amount of liquid in the recipe.
Q4: What’s the best way to store homemade chili sauce?
The best way is in clean, airtight containers in the refrigerator. This will keep it fresh for about 2-3 weeks. Make sure the sauce has cooled completely before sealing the container to prevent condensation.
Q5: Can I make this chili sauce without a blender?
Absolutely! If you don’t have a blender or food processor, you can finely mince all the ingredients by hand after simmering. This will result in a more rustic, chunky texture, which many people love! Just ensure the chilies are very soft before attempting to mince them.
Q6: What can I use this chili sauce on?
The possibilities are endless! Drizzle it on tacos, burritos, eggs, grilled meats, sandwiches, or use it as a dipping sauce for spring rolls or dumplings. It’s also a great addition to marinades or salad dressings for an extra kick.
Your Flavor Journey Begins Now!
See? Making an amazing chili sauce is totally within your reach! You’ve learned how to select your chilies, prepare your ingredients, and blend everything into a wonderfully versatile condiment. This recipe is more than just a sauce; it’s a building block for delicious meals and a testament to your growing kitchen confidence.
Remember, the kitchen is your canvas. Don’t be afraid to play with flavors, adjust ingredients, and discover what makes your taste buds sing. Each time you make this chili sauce, you’ll get a little better, a little more intuitive.
So go ahead, give this recipe a try. Taste the difference fresh, homemade flavor makes. You’ve got this, and I can’t wait to hear about the amazing dishes you’ll create with your new favorite chili sauce! Happy cooking!