
Get ready to whip up fluffy, golden pancakes in minutes with this simple New Zealand-style recipe, perfect for a quick breakfast or brunch that even absolute beginners can master with ease.
Ever looked at a pancake recipe and felt a sigh escape your lips? Do you dream of enjoying delicious, fluffy pancakes without the fuss, but worry it’s too complicated? You’re not alone! Many of us think making perfect pancakes is a culinary challenge, but it really doesn’t have to be.
This easy pancake recipe, inspired by the simple delights enjoyed here in New Zealand, is designed to be incredibly straightforward. We’ll walk through each step, ensuring your batter is smooth and your pancakes are light and delicious.
Forget those complicated instructions; we’re keeping things wonderfully simple here. You’ll be flipping perfect pancakes before you know it.
So, let’s dive into the simple joy of making amazing pancakes!
Your Go-To Easy Pancake Recipe NZ
Making pancakes from scratch is surprisingly easy and incredibly rewarding. This recipe is designed for busy mornings and happy tummies, using basic ingredients you likely already have in your pantry. No fancy techniques, just pure, simple deliciousness.
The Magic of Simple Ingredients
The beauty of this recipe lies in its simplicity. We focus on common pantry staples to create light, fluffy pancakes.
Flour: All-purpose flour is your best friend here. It forms the base of our delicious pancakes.
Sugar: A little sweetness goes a long way. It adds flavour and helps with browning.
Baking Powder: This is the leavening agent that makes your pancakes nice and fluffy.
Salt: Just a pinch to balance the sweetness and enhance the overall flavour.
Milk: You can use dairy milk or a plant-based alternative like almond or soy milk.
Egg: One egg helps bind everything together and adds richness.
Butter (melted): Melted butter not only adds a lovely rich flavour but also helps make the pancakes tender.
What You’ll Need: Simple Tools for Success
You don’t need a professional kitchen to make great pancakes! Here are the basic tools that will make your pancake-making journey smooth.
Measuring Cups and Spoons: Accuracy is key for consistent results.
Large Mixing Bowl: To combine all your wet and dry ingredients.
Whisk: For getting that batter nice and smooth.
Ladle or Measuring Cup: To pour batter onto your pan.
Frying Pan or Griddle: A non-stick pan is ideal for easy flipping.
Spatula: For flipping those beautiful pancakes!
Wire Rack (Optional): To keep cooked pancakes warm while you finish the batch.
Let’s Get Cooking: Step-by-Step Easy Pancake Magic
Follow these easy steps, and you’ll be enjoying a stack of perfect pancakes in no time.
Step 1: Mix the Dry Ingredients
In your large mixing bowl, whisk together:
1 ½ cups all-purpose flour
2 tablespoons white sugar
2 teaspoons baking powder
½ teaspoon salt
Whisking the dry ingredients first helps distribute the baking powder evenly, ensuring every pancake puffs up beautifully.
Step 2: Combine the Wet Ingredients
In a separate, smaller bowl or jug, whisk together:
1 ¼ cups milk
1 large egg
2 tablespoons melted unsalted butter (cooled slightly)
Make sure your melted butter isn’t too hot, or it could scramble the egg!
Step 3: Combine Wet and Dry Mixtures
Pour the wet ingredients into the bowl with the dry ingredients. Gently whisk them together until just combined.
It’s okay if there are a few small lumps in the batter – overmixing can lead to tough pancakes. A few lumps are a good sign of a light, tender texture.
Step 4: Heat Your Pan
Place your frying pan or griddle over medium heat. To check if it’s ready, flick a tiny drop of water onto the surface. If it sizzles and evaporates quickly, your pan is at the perfect temperature.
You can grease your pan with a tiny bit of butter, oil, or cooking spray, especially if it’s not a non-stick pan.
Step 5: Cook the Pancakes
Using a ladle or a ¼ cup measuring cup, pour batter onto the hot pan. Aim to make pancakes about 10-12cm (4-5 inches) in diameter.
Cook for 2-3 minutes on the first side, or until you see small bubbles appearing on the surface and the edges look set.
Step 6: Flip and Finish
Gently slide your spatula under the pancake and flip it over. Cook for another 1-2 minutes on the second side, until golden brown and cooked through.
Step 7: Serve Them Up!
Remove the cooked pancake from the pan and place it on a plate. If you’re making a big batch, you can keep them warm on a wire rack in a low oven (around 100°C/200°F) while you cook the rest.
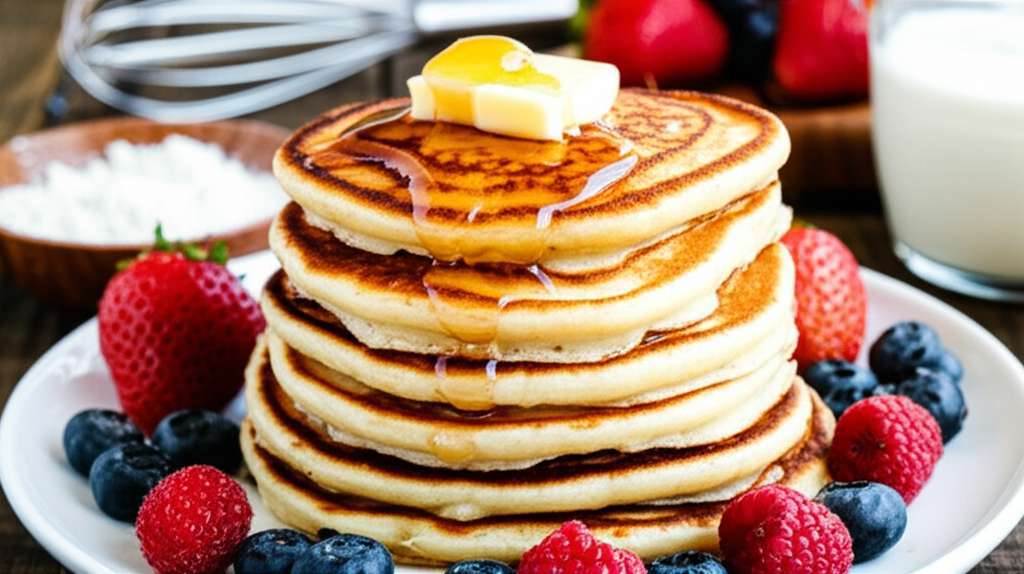
Serve immediately with your favourite toppings – think golden syrup, maple syrup, fresh berries, a dollop of whipped cream, or a dusting of icing sugar. Enjoy your delicious, easy-peasy pancakes!
A Quick Visual Guide to Pancake Perfection
Sometimes seeing is believing. Here’s a quick breakdown of what to look for during the cooking process.
| Stage | What to See | What to Do |
| :————– | :———————————————————————————- | :—————————————————————————————————— |
| Batter Prep | Smooth batter with a few small lumps. Not thin and watery, not thick and gloopy. | Stop mixing when just combined. A thicker batter leads to fluffier pancakes. |
| First Side | Bubbles forming on the surface, edges look dry and set. Golden-brown underneath. | Wait for bubbles to appear before flipping. This signifies the pancake is ready to be turned. |
| Second Side | Golden-brown and cooked through. | Cook for a shorter time than the first side. Gently press the centre; it should feel firm, not soft. |
Tips for Extra Fluffy Pancakes
Want to elevate your pancake game? Here are a few insider tips:
Don’t Overmix: I can’t stress this enough! Lumpy batter is happy batter for pancakes.
Rest the Batter (Optional but Recommended): Letting the batter sit for 5-10 minutes can help the gluten relax, leading to even more tender pancakes.
Medium Heat is Key: Too high heat will burn the outside before the inside is cooked. Too low, and they’ll be pale and a bit sad.
Clean, Hot Pan: A consistently hot pan ensures even cooking and easy flipping.
Don’t Crowd the Pan: Give your pancakes space to cook and flip without sticking to each other.
Pancake Variations & Add-ins (Get Creative!)
Once you’ve mastered the basic recipe, why not try adding a little something extra?
Blueberry Bliss: Gently fold ½ cup of fresh or frozen blueberries into the batter just before cooking.
Chocolate Chip Dream: Add ½ cup of mini chocolate chips to the batter.
Banana Boost: Mash one ripe banana and add it to the wet ingredients.
Cinnamon Spice: Add ½ teaspoon of ground cinnamon to the dry ingredients for a warm, comforting flavour.
Serving Suggestions: Beyond the Syrup Bottle
While syrup is a classic, there are so many delightful ways to enjoy your homemade pancakes.
Fresh Fruit: Sliced bananas, strawberries, raspberries, or even a sprinkle of kiwifruit.
Creamy Goodness: Whipped cream, Greek yogurt, or a dollop of sour cream.
Nutty Crunch: Toasted almonds, chopped walnuts, or a drizzle of peanut butter.
Sweet Surprises: A sprinkle of icing sugar, a few extra chocolate chips on top, or a drizzle of honey.
Storage and Reheating Your Pancakes
Leftover pancakes? No problem!
Storage:
Allow pancakes to cool completely on a wire rack. Store them in an airtight container or a resealable plastic bag in the refrigerator for up to 2-3 days. You can also freeze them by wrapping individual pancakes tightly in plastic wrap, then placing them in a freezer bag. They’ll keep in the freezer for up to 2 months.
Reheating:
Microwave: Place a few pancakes on a microwave-safe plate and heat for 30-60 seconds, or until warmed through. Be careful not to overheat, as they can become a bit chewy.
Toaster: For a crisper texture, you can reheat pancakes in a toaster on a low setting. Make sure they are completely cool if using this method.
Oven: For a larger batch, spread them on a baking sheet and warm them in a preheated oven at 175°C (350°F) for about 5-7 minutes.
Understanding Ingredient Substitutions
Sometimes you might be missing a key ingredient. Here are some common swaps that work well for this recipe.
| Ingredient | Substitution Option | Notes |
| :——————- | :———————————————————————— | :——————————————————————————- |
| Milk | Soy milk, almond milk, oat milk, buttermilk, water | Plant-based milks work great. Buttermilk adds tanginess and extra tenderness. |
| Egg | 1 “flax egg” (1 tbsp ground flaxseed + 3 tbsp water, let sit 5 mins) | For a vegan option. May result in slightly denser pancakes. |
| Butter | Vegetable oil, melted margarine, coconut oil | Use a neutral-flavoured oil for best results. |
| All-Purpose Flour| Whole wheat flour (use half and half for lighter texture), cake flour | Whole wheat will make them denser and nuttier. Cake flour for extra tender. |
Food Safety: Keeping Your Pancakes Safe
It’s always good practice to be mindful of food safety, even with simple recipes.
Raw Eggs: Always ensure eggs are fresh and stored correctly. Wash your hands thoroughly after handling them.
Cooking Temperature: Ensure pancakes are cooked through to avoid any risk associated with undercooked eggs. The FDA recommends cooking eggs until the yolk and white are firm. Read more about egg safety at the FDA Food Safety website.
Storage: Refrigerate leftover batter and cooked pancakes promptly. While this recipe isn’t likely to cause major issues if left out for a short time, it’s best practice to store perishable ingredients safely. For more comprehensive food storage guidelines, check out resources like the USDA Food Safety and Inspection Service.
Frequently Asked Questions About Easy Pancakes
Q1: My pancakes are coming out flat and dense. What did I do wrong?
A1: This is usually caused by overmixing the batter or using too much liquid. Stop mixing when you see just a few lumps. Also, ensure your baking powder is fresh – it loses its leavening power over time.
Q2: How can I make sure my pancakes are perfectly round?
A2: Use a measuring cup or ladle to pour a consistent amount of batter onto the pan each time. Avoid spreading the batter too much once it hits the pan; let its own weight do the work.
Q3: Can I use whole wheat flour instead of all-purpose flour?
A3: Yes, you can! However, using 100% whole wheat flour can result in denser, heavier pancakes. For a lighter texture, try a mix of half all-purpose and half whole wheat flour.
Q4: My pancakes are burning on the outside but raw in the middle. What should I do?
A4: Your pan is likely too hot. Reduce the heat to medium. It’s better to cook pancakes a little longer over lower heat than to have them burn before they cook through.
Q5: How do I know when it’s time to flip a pancake?
A5: Look for small bubbles appearing on the surface of the pancake. The edges should also start to look set and slightly drier. This usually takes about 2-3 minutes on the first side.
Q6: Can I make this recipe vegan?
A6: Absolutely! Replace the milk with your favourite plant-based milk (soy, almond, oat) and use a flax egg (mix 1 tablespoon of ground flaxseed with 3 tablespoons of water and let sit for 5 minutes) instead of a regular egg. Ensure your sugar is vegan if that’s a concern.
Q7: My batter seems too thick. Should I add more milk?
A7: A slightly thick batter is usually good for fluffy pancakes. If it’s genuinely too thick to pour or spread, add milk about a tablespoon at a time until it reaches a pourable consistency, but still thick enough to hold its shape when poured.
Conclusion: Your Pancake Adventure Begins!
And there you have it – your gateway to delicious, homemade pancakes, made simple and stress-free! From the whisking of ingredients to that satisfying flip, you’ve got this. This easy pancake recipe NZ proves that great food doesn’t need to be complicated.
Remember, cooking is a journey, and every perfectly golden pancake you create is a step forward. Enjoy experimenting with toppings, sharing them with loved ones, or simply savouring them on your own. Keep practicing, keep enjoying, and happy cooking!

Henry is the creator of CookCanvas, where home cooking meets creativity. With a passion for making food simple and enjoyable, he helps beginners and busy families cook confidently at home. Through easy tutorials, time-saving tips, and practical recipes, Henry turns everyday ingredients into delicious, stress-free meals anyone can make.
When he’s not testing new recipes, you’ll find him exploring local markets, photographing food, and sharing kitchen wisdom that inspires confidence in every cook.