
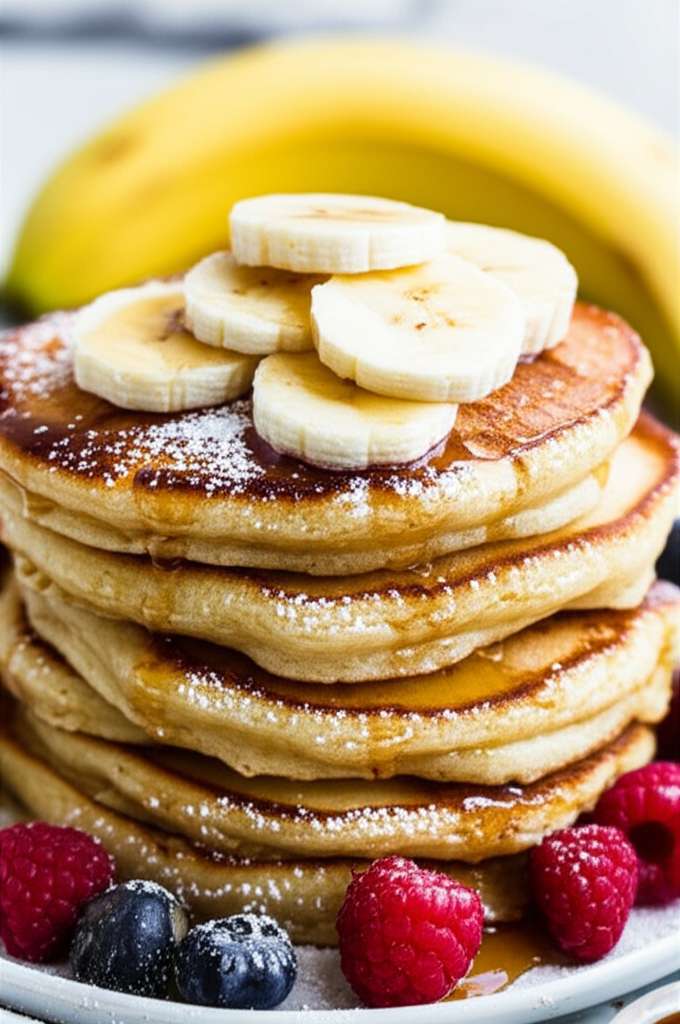
Gluten-free banana pancakes are a simple, delicious, and healthy breakfast solution for anyone looking for a satisfying meal without gluten. This easy recipe uses common ingredients to create fluffy, flavorful pancakes perfect for beginners.
Making delicious pancakes at home can feel like a challenge, especially when you’re navigating gluten-free options. Many gluten-free recipes turn out dry, crumbly, or just plain bland, leaving you feeling a bit discouraged. But what if I told you that you could whip up a batch of incredibly fluffy, naturally sweet, and wonderfully satisfying gluten-free banana pancakes right in your own kitchen? It’s absolutely possible, and I’m here to show you how, step-by-step.
Today, we’re diving into a recipe that’s not only beginner-friendly but also packed with wholesome goodness. We’ll be using ripe bananas to bring natural sweetness and moisture, ensuring your pancakes are tender and flavorful without needing refined sugar or complicated ingredients. Get ready to transform your mornings with a treat that’s both healthy and delightful.
So, grab your apron, and let’s get started on creating these amazing gluten-free banana pancakes that will have everyone asking for seconds! We’ll cover everything from the simple ingredients you’ll need to the exact steps for perfect fluffy pancakes every time.
Why Gluten-Free Banana Pancakes?
Gluten-free banana pancakes are a fantastic choice for many reasons. They naturally cater to those with gluten sensitivities or celiac disease, but they also offer a healthier twist for everyone. The ripe bananas in this recipe are a powerhouse of nutrients, providing potassium and natural sweetness, which means you can reduce or even skip added sugars.
This recipe is designed to be incredibly forgiving and straightforward. You don’t need fancy equipment or a culinary degree to master it. By using simple, accessible ingredients and following clear instructions, you’ll build confidence in your kitchen. We’re focusing on creating a recipe that’s approachable, delicious, and genuinely enjoyable to make.
You’ll learn how simple ingredients can come together to create something truly special. We’ll break down each step so you understand not just what to do, but why you’re doing it. This will empower you to make these pancakes again and again, and even start experimenting with your own variations.
Gather Your Gluten-Free Banana Pancake Ingredients
The beauty of this gluten-free pancake recipe lies in its simplicity and the readily available ingredients. You likely have most of these in your pantry right now! Using ripe bananas is key here, as they provide moisture and sweetness.
Here’s what you’ll need to gather for a perfect batch:
- 1 ripe banana, mashed well (about 1/2 cup mashed)
- 1 large egg
- 1/4 cup milk (dairy or non-dairy like almond, soy, or oat milk)
- 1 tablespoon melted coconut oil or unsalted butter, plus more for cooking
- 1 teaspoon vanilla extract
- 1/2 cup gluten-free all-purpose flour blend (ensure it contains xanthan gum, or add 1/4 tsp if it doesn’t)
- 1 teaspoon baking powder
- 1/4 teaspoon salt
- Optional: Pinch of cinnamon or nutmeg for extra flavor
Using a ripe banana is crucial. It should have plenty of brown spots – this indicates it’s sweet and soft, perfect for mashing into a smooth consistency. If your banana isn’t very ripe, it won’t contribute as much sweetness or moisture to the batter.
The gluten-free flour blend is important for texture. Different blends can yield slightly different results, so don’t be afraid to try a few to find your favorite. Ensure your blend contains xanthan gum, as this acts as a binder, mimicking gluten’s role in traditional pancakes.
Essential Kitchen Tools for Pancake Success
You don’t need a professional kitchen setup to make these pancakes. Just a few common tools will do the trick. Having everything ready before you start mixing will make the process smooth and enjoyable.
Here are the essential tools you’ll want to have on hand:
- Medium-sized mixing bowl
- Fork or potato masher for the banana
- Whisk or fork for mixing the batter
- Measuring cups and spoons
- Non-stick skillet or griddle
- Spatula for flipping
- Small bowl or cup for melting butter/oil
A good non-stick skillet is your best friend when making pancakes. It prevents sticking and ensures easy flipping. Make sure your spatula is wide enough to get under the entire pancake without breaking it.
Having a whisk will help you achieve a smooth batter, but a fork works perfectly well too. Don’t worry if you don’t have every single item; improvisation is part of the fun in the kitchen!
Step-by-Step: Crafting Your Gluten-Free Banana Pancakes
Now for the fun part – making the pancakes! We’ll go through each step clearly, so you can follow along with confidence. Remember, the goal is delicious, fluffy pancakes, and this method is designed for success.
Step 1: Mash the Banana
Start by placing your ripe banana in the medium-sized mixing bowl. Use a fork or a potato masher to mash it until it’s as smooth as possible. You want to break down all the lumps.
This step is important for ensuring the banana is evenly distributed throughout the batter, contributing to a consistent flavor and texture. A well-mashed banana will also make your batter smoother.
Step 2: Whisk in Wet Ingredients
Add the egg, milk, melted coconut oil (or butter), and vanilla extract to the bowl with the mashed banana. Whisk everything together until it’s well combined.
This mixture forms the base of your pancake batter. Whisking ensures the egg is broken up and everything is emulsified, creating a lovely liquid base.
Step 3: Combine Dry Ingredients
In a separate small bowl, whisk together the gluten-free flour blend, baking powder, and salt. If you’re adding cinnamon or nutmeg, mix them in now.
Whisking the dry ingredients separately ensures that the baking powder and salt are evenly distributed. This helps the pancakes rise evenly and prevents any pockets of saltiness.
Step 4: Combine Wet and Dry Mixtures
Pour the dry ingredients into the bowl with the wet ingredients. Stir gently with your whisk or a spoon until just combined. Be careful not to overmix! A few small lumps in the batter are perfectly fine.
Overmixing can develop the starches in the gluten-free flour too much, potentially leading to tougher pancakes. Just mix until you no longer see streaks of dry flour.
Step 5: Heat Your Skillet
Place your non-stick skillet or griddle over medium heat. Add a small amount of melted coconut oil or butter to coat the surface. You want it hot enough to sizzle gently when a drop of batter hits it, but not so hot that it burns.
Getting the skillet temperature right is key to perfectly cooked pancakes. Too low, and they’ll be pale and dense; too high, and they’ll burn on the outside before the inside is cooked.
Step 6: Cook the Pancakes
Pour about 1/4 cup of batter onto the hot skillet for each pancake. Cook for 2-3 minutes, or until you see bubbles forming on the surface and the edges look set.
Watch for those bubbles! They are your signal that the pancake is ready to be flipped. This usually takes a couple of minutes.
Step 7: Flip and Finish
Carefully slide your spatula under the pancake and flip it over. Cook for another 1-2 minutes on the other side, until golden brown and cooked through.
A gentle flip is all it takes. The second side usually cooks a little faster than the first.
Step 8: Serve and Enjoy!
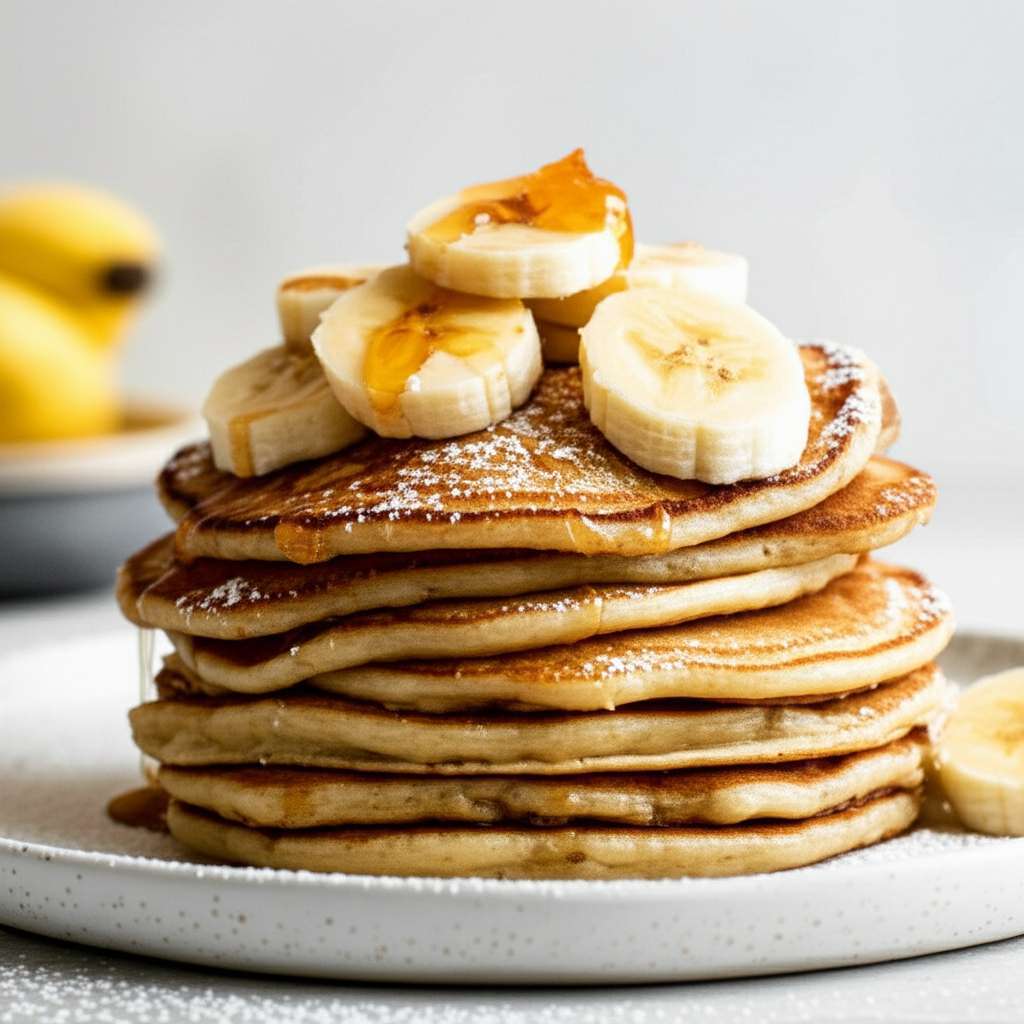
Remove the cooked pancakes from the skillet and place them on a plate. Repeat with the remaining batter, adding a little more oil or butter to the skillet as needed. Serve immediately with your favorite toppings!
These pancakes are best enjoyed fresh off the griddle. Top them with fresh fruit, a drizzle of honey, a dollop of yogurt, or a sprinkle of nuts.
Tips for Perfectly Fluffy Gluten-Free Banana Pancakes
Achieving that perfect fluffy texture in gluten-free pancakes is all about a few key techniques. Don’t worry if your first attempt isn’t magazine-perfect; practice makes perfect, and these tips will guide you.
Here are some tips to ensure your gluten-free banana pancakes are light and airy:
- Don’t Overmix the Batter: As mentioned, overmixing can lead to tough pancakes. Mix until just combined.
- Let the Batter Rest (Optional but Recommended): Letting the batter sit for 5-10 minutes can help the gluten-free flours hydrate, leading to a better texture.
- Use a Hot Skillet: A properly heated skillet is crucial for even cooking and browning. Test it with a drop of water – it should sizzle and evaporate quickly.
- Don’t Crowd the Pan: Cook only 2-3 pancakes at a time, depending on the size of your skillet. This allows them to cook evenly and makes flipping easier.
- Use Ripe Bananas: The riper, the sweeter and more moist your pancakes will be.
- Adjust Milk Consistency: If your batter seems too thick, add a tiny splash more milk. If it’s too thin, add a sprinkle more gluten-free flour.
These little adjustments can make a big difference in the final outcome. Remember, cooking is a science and an art, and small tweaks can lead to delicious discoveries.
Understanding Gluten-Free Flours
Navigating gluten-free flours can be one of the trickiest parts of gluten-free baking for beginners. Each type of flour has unique properties that affect texture and flavor. For pancakes, a blend is usually best, as it combines the strengths of different flours.
Most store-bought gluten-free all-purpose flour blends are designed to be a 1:1 substitute for wheat flour. They often contain a mix of rice flour, tapioca starch, potato starch, and sometimes sorghum or almond flour. The addition of xanthan gum is vital as it acts as a binder, crucial for structure in gluten-free recipes.
It’s important to understand that gluten-free flours don’t absorb liquid the same way wheat flour does. This is why resting the batter can be so beneficial. It allows the flours to fully hydrate, preventing a gritty texture.
For more in-depth information on gluten-free baking, including understanding different flour types and their uses, the King Arthur Baking ingredient guide is an excellent resource. It provides detailed information on various flours and how they perform in recipes.
Ingredient Substitutions and Variations
This recipe is wonderfully adaptable! Feel free to play around with it once you’ve mastered the basic steps. Small changes can lead to exciting new flavors and textures.
Here are some ideas for substitutions and variations:
| Ingredient | Substitution/Variation | Notes |
|---|---|---|
| Milk | Any non-dairy milk (almond, soy, oat, coconut) or even water | Almond and oat milk are often neutral in flavor. Coconut milk can add a subtle tropical note. |
| Melted Coconut Oil/Butter | Any neutral-flavored oil (like vegetable or canola), or applesauce (for lower fat) | Applesauce will make the pancakes moister but might affect the browning. |
| Vanilla Extract | Almond extract, maple extract, or omit | Use almond extract sparingly as it’s potent. |
| Gluten-Free Flour Blend | Specific gluten-free flours like oat flour (certified GF), almond flour, or buckwheat flour (use with caution, can be dense) | If using single flours, you may need to adjust binders and liquids. A blend is generally most reliable for beginners. |
| Banana | Mashed berries (strawberries, blueberries), unsweetened applesauce | Berries may require slightly less liquid. Applesauce adds moisture and sweetness. |
You can also add mix-ins to your batter before cooking. Consider adding a handful of blueberries, a sprinkle of chocolate chips, or some chopped nuts. Just be sure to fold them in gently at the end of mixing the batter.
Nutritional Information Considerations
While this recipe is healthier than many traditional pancake recipes, it’s still good to be aware of the nutritional aspects. The primary “health boost” comes from the ripe bananas, which offer natural sugars, fiber, and potassium.
A medium banana (about 7-8 inches long) contains roughly 105 calories, 27 grams of carbohydrates (including about 14 grams of sugar and 3 grams of fiber), and 422 milligrams of potassium, which is about 10% of the daily recommended intake. The protein comes from the egg, and the fat content depends on the milk and oil used.
For those managing their sugar intake, relying on the sweetness of the banana is a great start. You can further reduce sugar by choosing unsweetened non-dairy milk and avoiding sugary toppings. For a more complete breakdown of nutritional values, you can use online tools like the MyFitnessPal calorie and nutrition database for specific ingredient amounts.
The type of gluten-free flour blend you use can also impact the fiber and nutrient content. Some blends are made with whole grains, offering more fiber and nutrients than those made primarily with starches.
Frequently Asked Questions About Gluten-Free Banana Pancakes
Here are some common questions beginners have about making gluten-free banana pancakes. Don’t hesitate to ask if you have more!
-
Q: My pancakes are flat and dense. What did I do wrong?
A: This is often due to overmixing the batter, which can make gluten-free flours gummy. Another common cause is not using enough leavening agent (baking powder) or having an expired baking powder. Ensure your baking powder is fresh!
-
Q: Can I make the batter ahead of time?
A: Yes, you can make the batter up to 24 hours in advance and store it in the refrigerator. Gluten-free flours benefit from resting, so this can actually improve texture. Just give it a gentle stir before cooking, as it might thicken.
-
Q: My pancakes stick to the pan. How can I prevent this?
A: Ensure your non-stick skillet is truly non-stick and heated properly over medium heat. Don’t use too little fat; a light coating of oil or butter is essential. Also, wait for those bubbles to appear on the surface before attempting to flip.
-
Q: Can I use an egg substitute?
A: Yes, you can. A common egg substitute for pancakes is a “flax egg” (1 tablespoon ground flaxseed mixed with 3 tablespoons water, let sit for 5-10 minutes) or a commercial egg replacer. Note that this might slightly alter the texture.
-
Q: How can I make them vegan?
A: To make these vegan, use a non-dairy milk, replace the egg with a flax egg or other vegan egg replacer, and use coconut oil or another plant-based fat. Ensure your gluten-free flour blend is also vegan.
-
Q: What are the best toppings for gluten-free banana pancakes?
A: Fresh berries, sliced bananas, a dollop of Greek yogurt or coconut yogurt, a sprinkle of chopped nuts or seeds, a drizzle of maple syrup or honey, or even a bit of nut butter are all delicious options!
Answering these questions helps demystify the process and build confidence for new cooks. It’s all about learning from your experience and making adjustments as needed.
Conclusion: Enjoy Your Delicious Creation!
There you have it – a simple, straightforward, and utterly delicious gluten-free banana pancake recipe! You’ve learned how to combine basic ingredients, understand the nuances of gluten-free flours, and follow clear steps to achieve a wonderfully fluffy breakfast treat.
Remember, the kitchen is a place for creativity and enjoyment, not stress. This recipe is designed to be your starting point, a reliable foundation for delicious homemade pancakes. Whether you’re gluten-sensitive or just looking for a healthier, more flavorful breakfast, these banana pancakes are sure to become a favorite.
So, go ahead and try them! Gather your ingredients, follow the steps, and savor the amazing aroma as they cook. Don’t be afraid to experiment with toppings or variations. You’ve got this, and I can’t wait for you to enjoy the fruits of your delicious labor. Happy cooking!