Get amazing flavor with this easy McCormick chili seasoning recipe! It’s a simple homemade blend that rivals store-bought, perfect for beginners wanting delicious chili without the fuss.
Have you ever opened a packet of chili seasoning and wondered what makes it taste so good? It’s a common question, especially when you’re just starting out in the kitchen. Many store-bought mixes contain a lot of salt and sometimes even fillers, which can leave you wanting more control over your ingredients and flavor.
That’s where making your own McCormick chili seasoning recipe at home comes in! It’s surprisingly simple and allows you to customize the spice and flavor exactly to your liking. I’m here to guide you through creating a fantastic chili seasoning blend that will make your chili sing.
We’ll break down exactly what goes into it, how to mix it, and even how to store it so you have delicious chili flavor ready whenever you need it. You’ll feel so accomplished making this yourself!
Why Make Your Own Chili Seasoning?
Making your own chili seasoning might seem like an extra step, but the benefits are huge. You get to control every single ingredient, ensuring the best possible flavor without any unwanted additives.
Store-bought packets can be loaded with sodium and preservatives. By mixing your own, you can reduce the salt content and avoid anything artificial. This is especially helpful if you have dietary restrictions or simply prefer a cleaner ingredient list.
Plus, the aroma of freshly mixed spices is incredible! It truly elevates your cooking experience and the final dish. You’ll be amazed at the difference fresh, homemade seasoning makes.
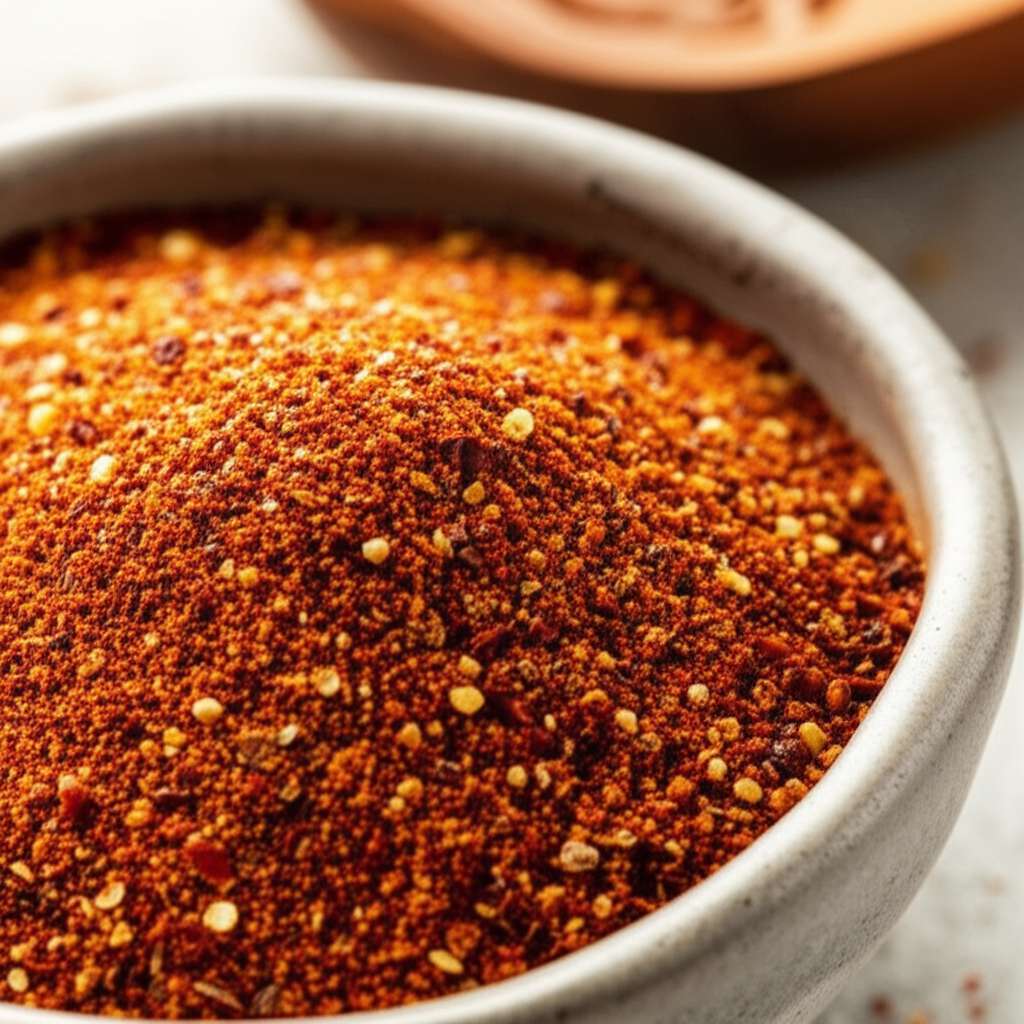
The Magic Ingredients for Your McCormick Chili Seasoning Recipe
This recipe is all about bringing together common pantry spices to create a robust and flavorful blend. Think of these as your building blocks for delicious chili!
The foundation of any great chili seasoning is chili powder, of course. But we’re going to layer in other spices to add depth and complexity. This blend is designed to be balanced, with a little heat, a little warmth, and a lot of savory goodness.
Gathering these ingredients is the first exciting step. You likely have many of them already! Let’s look at what you’ll need.

Essential Spices
- Chili Powder: This is your star ingredient. A good quality chili powder forms the base of the flavor.
- Cumin: Essential for that smoky, earthy flavor characteristic of chili.
- Paprika: Adds a mild sweetness and beautiful color. Smoked paprika can add an extra layer of smoky depth.
- Garlic Powder: Provides a consistent, savory garlic note that’s crucial for depth.
- Onion Powder: Balances the other flavors and adds a sweet, pungent aroma.
- Oregano: Dried oregano, preferably Mexican oregano if you can find it, adds a subtle herbaceous note.
- Cayenne Pepper: For a touch of heat. Adjust this to your personal spice preference.
- Salt: Enhances all the other flavors. You can control the amount here.
- Black Pepper: Freshly ground black pepper adds a subtle bite.
Optional Enhancers
Want to take your chili seasoning to the next level? Consider these additions:
- Coriander: Adds a slightly citrusy, warm flavor that complements cumin.
- Cocoa Powder (unsweetened): A small amount can add incredible richness and depth without making the chili taste like chocolate.
- Red Pepper Flakes: For extra visible flecks of heat and a slightly different kind of spice.
- Smoked Paprika: If you didn’t use it as your main paprika, this can add a wonderful smoky dimension.
Your Simple McCormick Chili Seasoning Recipe
Creating this blend is as easy as measuring and mixing. There’s no cooking involved, making it a perfect beginner recipe. You’re just combining the powerhouses of flavor!
We’ll aim for a balanced mix that provides a robust flavor profile. This recipe is designed to be a starting point, and you can easily tweak it to your taste buds. Think of it as your personal chili flavor signature!
Let’s get those spices together and create something delicious.
The Recipe Breakdown
This recipe makes enough seasoning for about 2 pounds of ground meat or beans, perfect for a standard batch of chili.
| Ingredient | Amount |
|---|---|
| Chili Powder | 3 tablespoons |
| Cumin | 2 tablespoons |
| Paprika (sweet or smoked) | 1 tablespoon |
| Garlic Powder | 1 teaspoon |
| Onion Powder | 1 teaspoon |
| Dried Oregano | 1 teaspoon |
| Cayenne Pepper | ½ teaspoon (or to taste) |
| Salt | 1 teaspoon (optional, adjust to taste) |
| Black Pepper | ½ teaspoon |
Optional Add-ins (adjust to taste)
| Optional Ingredient | Amount |
|---|---|
| Ground Coriander | 1 teaspoon |
| Unsweetened Cocoa Powder | ½ teaspoon |
| Red Pepper Flakes | ¼ teaspoon |
Tools You’ll Need
You don’t need any fancy equipment to make this chili seasoning. The beauty of this recipe is its simplicity and accessibility. Most kitchens will have these items readily available.
Having the right tools makes any cooking task smoother, and this is no exception. Having a few measuring spoons and a bowl is all it takes.
Let’s gather what you’ll need.
- Measuring Spoons: Essential for accurate spice ratios.
- Small Mixing Bowl: To combine all your spices.
- Whisk or Spoon: For thoroughly mixing the ingredients.
- Airtight Container: For storing your finished seasoning blend. Jars or small plastic containers work well.
Step-by-Step: Making Your Chili Seasoning
Now for the fun part! Let’s bring these wonderful spices together to create your signature chili flavor. Follow these simple steps for perfect results every time.
The key here is thorough mixing. You want to ensure that every spoonful of seasoning you use in your chili has a balanced mix of all the flavors. This ensures consistency and deliciousness in every bite.
Let’s get started!
Step 1: Measure Your Spices
Carefully measure out all the ingredients listed in the main recipe into your small mixing bowl. Be as precise as possible with your measurements for the best flavor balance.
If you’re using any of the optional enhancers, measure those out too. You can decide to add them now or keep them separate for future experimentation.
Step 2: Combine and Mix
Once all your spices are in the bowl, it’s time to mix them thoroughly. Use a whisk or a spoon to combine everything. Make sure there are no clumps and that all the spices are evenly distributed.
Give it a good stir for at least 30 seconds to ensure maximum blending. You should start to smell the wonderful aroma of chili spices filling your kitchen!
Step 3: Taste and Adjust (Optional but Recommended)
This is where you can personalize your seasoning. If you’re feeling adventurous, take a tiny pinch of the mixture and taste it (be careful, it’s concentrated!). Does it need more heat? More cumin? Adjust the cayenne pepper or cumin according to your preference.
Remember that the flavor will mellow and meld when cooked in your chili. So, if it tastes a little strong now, that’s perfectly normal. This step is all about getting it right for you.
Step 4: Store Your Seasoning
Transfer your perfectly mixed chili seasoning into an airtight container. Label the container with the name of the seasoning and the date you made it. This helps you keep track of your homemade spice blends.
Store the container in a cool, dark place, such as your pantry or spice cabinet. Properly stored, your homemade chili seasoning will stay fresh and flavorful for several months.
How to Use Your Homemade Chili Seasoning
Now that you have your delicious homemade chili seasoning, how do you use it? It’s straightforward, and it will make your chili taste amazing. You can use it in place of any store-bought chili seasoning packet.
A good rule of thumb is to start with about 2 to 3 tablespoons of your homemade blend for every pound of ground meat or beans you are using. This provides a solid base flavor for your chili.
You can always add more towards the end of cooking if you feel it needs an extra kick. Cooking is all about tasting and adjusting as you go!
Tips for Using Your Blend
- Start with 2-3 tablespoons per pound of main ingredient (meat/beans). This is a great starting point.
- Add towards the beginning of cooking. This allows the flavors to bloom and meld with your other chili ingredients.
- Taste and adjust. Always taste your chili before serving and add more seasoning if needed.
- Consider blooming the spices. For an extra burst of flavor, you can toast your spice blend in a little oil for about 30 seconds before adding your main ingredients. This releases their aromatic compounds.
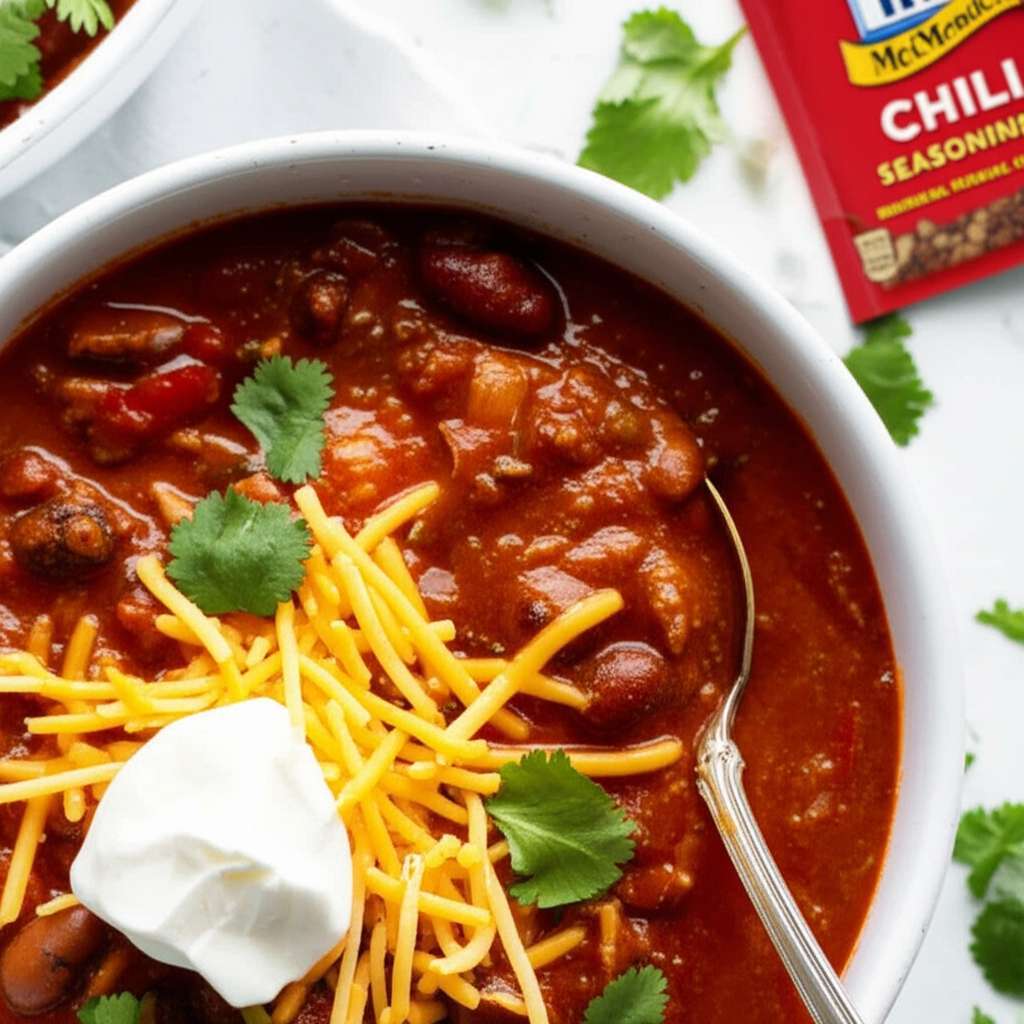
McCormick Chili Seasoning vs. Homemade: What’s the Difference?
It’s helpful to understand why making your own can be so rewarding compared to relying on pre-made blends like McCormick’s. Both can be delicious, but the control you have with homemade is a game-changer.
McCormick is a trusted brand, and their chili seasoning is a convenient option. However, it’s formulated for broad appeal, which often means a specific salt level and a set of flavors that might not be exactly what you’re looking for.
Let’s look at some key differences:
| Feature | Store-Bought (e.g., McCormick) | Homemade Blend |
|---|---|---|
| Ingredient Control | Limited; may contain added salt, anti-caking agents, and fillers. | Full control over spices, salt, and heat levels. |
| Freshness | Can be very fresh, but shelf life is optimized. | Freshly mixed, vibrant flavor; best used within months. |
| Customization | Fixed flavor profile. | Easily adjustable to personal taste (spicier, smokier, etc.). |
| Sodium Content | Often higher due to added salt for preservation and flavor enhancement. | Can be controlled or omitted entirely. |
| Cost | Per packet cost can add up over time. | Generally more cost-effective in the long run, especially if you use spices regularly. |
| Convenience | Very convenient, grab-and-go. | Requires initial mixing, but still very quick to use once made. |
While a store-bought packet is quick, making your own McCormick chili seasoning recipe offers superior flavor personalization and ingredient transparency. It’s a small effort for a big reward in taste!
Tips for Spices and Food Safety
When working with spices, it’s good to keep a few things in mind to ensure you’re getting the best flavor and keeping things safe. Proper storage is key to maintaining the potency of your herbs and spices.
Think of spices like fresh ingredients; they lose their punch over time. Using old spices can result in a lackluster dish, no matter how good your recipe is. Also, knowing when to discard them is important.
Here are some helpful tips:
- Storage: Keep your spices in a cool, dark, dry place. Avoid storing them near the stove or in direct sunlight, as heat and light degrade their flavor and color.
- Freshness: Ground spices are generally best used within 6 months to a year. Whole spices can last longer, sometimes for several years, but they are most flavorful when ground just before use.
- Quality Matters: Buy spices from reputable sources. Look for vibrant colors and strong aromas.
- USDA Food Safety Guidelines: While spices themselves don’t typically require strict food safety handling in the same way raw meats do, it’s always good practice to use clean utensils and containers when mixing and storing any food ingredients. For general food safety in the kitchen, the USDA provides excellent resources on proper handling and storage of all foods. You can find more information on their website.
Frequently Asked Questions about Chili Seasoning
Got questions about whipping up your own chili seasoning? That’s perfectly normal! It’s great to have a clear understanding of how to get the best results.
Let’s tackle some of the most common things people wonder about when making their own spice blends. I’m here to make sure you feel confident every step of the way.
Q1: How much homemade chili seasoning should I use in my chili recipe?
A: A good starting point is 2 to 3 tablespoons of your homemade seasoning for every pound of ground meat or beans. You can always add more to taste as your chili cooks, so don’t be afraid to adjust!
Q2: My chili seasoning doesn’t seem very spicy. How can I make it hotter?
A: The easiest way to increase the heat is by adding more cayenne pepper. You can also add a pinch of red pepper flakes or a dash of a hotter chili powder like chipotle or ghost pepper powder if you’re feeling brave!
Q3: Can I make a large batch of this seasoning to store for later?
A: Absolutely! This recipe is easily scalable. Just multiply the ingredient amounts by the number of batches you want to make. Store it in an airtight container in a cool, dark place, and it should stay fresh for several months.
Q4: What’s the difference between chili powder and cayenne pepper?
A: Chili powder is actually a blend of dried chili peppers and other spices like cumin and oregano. It provides the base flavor for chili. Cayenne pepper, on the other hand, is a single ground chili pepper and is used primarily to add heat.
Q5: Can I omit the salt from the recipe?
A: Yes, you can! If you prefer to control salt entirely at the end of cooking, simply leave the salt out of the seasoning blend. You can always add salt to the chili itself as it simmers.
Q6: How long does homemade chili seasoning last?
A: When stored properly in an airtight container in a cool, dark place, your homemade chili seasoning should remain flavorful for about 6 months to a year. After that, the potency of the spices may start to diminish.
Q7: Can I use fresh garlic and onion instead of powder?
A: While this recipe is designed for powders for ease of mixing and storage, you can certainly use fresh garlic and onion in your actual chili. When cooking your chili, sauté minced fresh garlic and onion before adding other ingredients. The powders in the seasoning blend provide a more concentrated, consistent flavor profile that distributes easily throughout the dish.
Conclusion: Your Kitchen, Your Flavor
See? Making your own McCormick chili seasoning recipe is simple, rewarding, and opens up a world of flavor possibilities for your chili. You’ve learned how to combine basic pantry spices into a blend that’s vibrant, delicious, and perfectly tailored to your taste.
This skill will empower you in the kitchen, allowing you to create comforting, homemade meals with confidence. Remember, cooking is a journey of exploration, and mastering little things like homemade spice blends makes the entire experience more enjoyable.
So, gather your spices, mix them up, and get ready to experience chili like never before. Your taste buds (and your family!) will thank you for it. Happy cooking!