
Whip up fluffy, golden pancakes with this super simple 1-cup flour pancake mix recipe – perfect for a quick breakfast or a weekend treat! This easy guide shows you exactly how to make delicious homemade pancakes from scratch in minutes, turning any morning into a delight.
Pancake Mix Recipe: Just 1 Cup Flour, Loads of Delight!
Ever stare into your pantry, craving warm, fluffy pancakes, only to realize you’re out of that special boxed mix? It happens to all of us!
But what if I told you that creating absolutely delightful pancakes from scratch is surprisingly easy, especially when you only need about a cup of flour? You don’t need a fancy mix to achieve that perfect breakfast.
This recipe is crafted to be your go-to. It’s designed for beginners, using common ingredients you likely already have. We’ll walk through each step together, making sure your pancakes turn out light, fluffy, and utterly delicious every single time.
Get ready to ditch the store-bought stuff and embrace the simple joy of homemade pancakes. Let’s get started and turn that cup of flour into a warm, comforting breakfast adventure!
Why This 1-Cup Flour Pancake Mix is Your New Best Friend
This recipe is a game-changer for a few simple reasons. It’s designed with you in mind, making pancake-making not just easy, but genuinely enjoyable.
- Minimal Ingredients: You probably have everything you need in your kitchen right now. No need for a special grocery run!
- Quick and Easy: From pantry to griddle in under 20 minutes. Perfect for busy mornings or spontaneous cravings.
- Customizable: This basic recipe is a blank canvas. Feel free to add your favorite mix-ins like berries, chocolate chips, or a dash of cinnamon.
- Perfect Portions: Making just enough for 1-2 people means less waste and always fresh pancakes when you want them.
What You’ll Need: Simple Ingredients for Simple Joy
Gathering your ingredients is the first step to pancake perfection. For this delightful 1-cup flour pancake mix, you’ll only need a few everyday pantry staples. Think of these as your building blocks for deliciousness!
Pantry Essentials:
- 1 cup All-Purpose Flour
- 2 teaspoons Granulated Sugar
- 2 teaspoons Baking Powder (make sure it’s fresh!)
- ¼ teaspoon Salt
- 1 large Egg
- ¾ cup Milk (any kind works – dairy, almond, soy!)
- 2 tablespoons Unsalted Butter, melted (or vegetable oil)
Kitchen Tools:
- Measuring cups and spoons
- A medium-sized mixing bowl
- A whisk or fork
- A liquid measuring cup
- A non-stick skillet or griddle
- A spatula (for flipping!)
- A ladle or ¼ cup measuring cup for pouring batter
Step-by-Step: Crafting Your Perfect Pancakes
Let’s get cooking! Follow these simple steps, and you’ll be enjoying fluffy, golden pancakes in no time. I’ll guide you through each part, so don’t worry – it’s much easier than you think!
Step 1: Whisk Together the Dry Ingredients
In your medium mixing bowl, combine the flour, sugar, baking powder, and salt. Give them a good whisk until everything is nicely blended. This helps distribute the leavening agents evenly, ensuring your pancakes rise beautifully.
The baking powder is what makes pancakes fluffy, and the salt balances the sweetness. Whisking them together now ensures every bite will be just right.
Step 2: Mix the Wet Ingredients
In a separate small bowl or a large liquid measuring cup, lightly beat the egg. Then, whisk in the milk and the melted butter (or oil) until well combined. It’s okay if the butter is a little warm; it just shouldn’t be hot enough to scramble the egg.
This mixture will bring your dry ingredients to life. Having the melted butter or oil incorporated here makes for a smoother batter later on.
Step 3: Combine Wet and Dry… Gently!
Now for the magic! Pour the wet ingredients into the bowl with the dry ingredients. Using your whisk or fork, stir just until the ingredients are barely combined. A few lumps are perfectly okay – in fact, they’re a good sign!
The key here is not to overmix. Overmixing develops the gluten in the flour, which can lead to tough, rubbery pancakes instead of light, fluffy ones. Stop stirring as soon as you don’t see streaks of dry flour.
Step 4: Heat Your Griddle or Skillet
Place your non-stick skillet or griddle over medium heat. Let it warm up for a few minutes. You can test if it’s ready by flicking a tiny drop of water onto the surface; if it sizzles and evaporates quickly, you’re good to go!
Getting the right temperature is crucial for golden-brown pancakes. Too hot, and they’ll burn on the outside before cooking through. Too cool, and they can become greasy and flat.
Step 5: Pour the Batter
Using a ladle or a ¼ cup measuring cup, pour the batter onto the hot griddle. Aim for about ¼ cup of batter per pancake. This size is classic and easy to manage.
Leave a little space between your pancakes so they don’t run into each other and are easy to flip.
Step 6: Cook and Flip!
Cook the first side for about 2-3 minutes. You’ll know it’s time to flip when you see bubbles forming on the surface of the pancake and the edges look set. Carefully slide your spatula underneath and flip.
Cook the second side for another 1-2 minutes, or until golden brown and cooked through. The batter should no longer be wet on top.
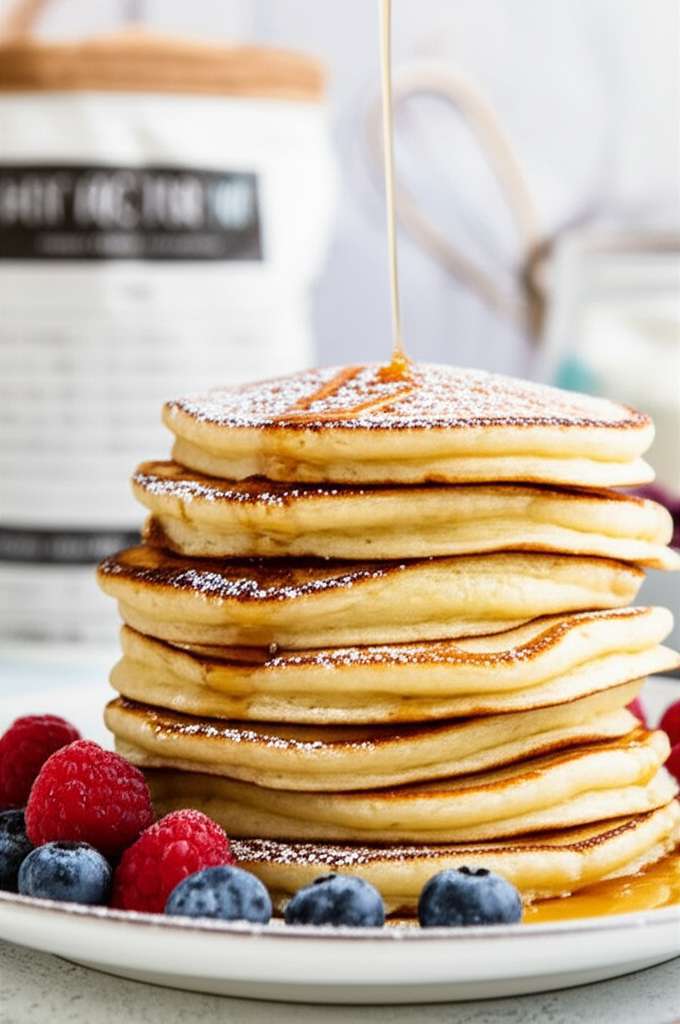
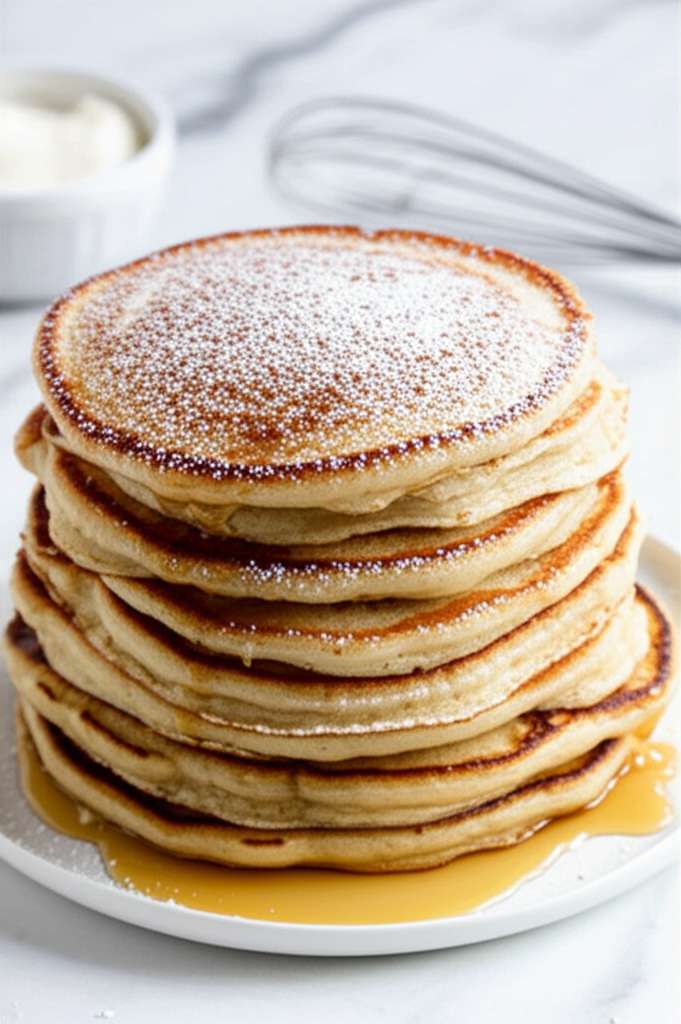
Step 7: Serve and Enjoy!
Transfer your beautifully cooked pancakes to a plate. Serve them immediately with your favorite toppings – butter, maple syrup, fresh fruit, whipped cream, or anything your heart desires!
If you’re making a larger batch, you can keep cooked pancakes warm in a single layer on a baking sheet in a low oven (around 200°F or 95°C) while you finish the rest.
Juicy Tips from Jonas for Pancake Perfection
As your kitchen guide, I’ve picked up a few tricks along the way that can make your pancake experience even better. These little tips can elevate your breakfast from good to truly delightful.
- Fresh Baking Powder is Key: Baking powder loses its potency over time. If yours has been in the cupboard for ages, it might be time for a new container to ensure fluffy pancakes. You can test it by putting a pinch in hot water; it should fizz actively.
- Don’t Overmix! (I can’t stress this enough!): Seriously, the lumps are your friends in pancake batter. A few stirs until just combined is all you need.
- Rest Your Batter (Optional, but Recommended): If you have 5-10 minutes, letting the batter rest after mixing can help the baking powder work its magic and result in even fluffier pancakes.
- Medium Heat is Your Friend: Patience is a virtue here. Cooking on medium heat ensures the inside cooks through without burning the outside. Adjust your stove as needed.
- Clean Surface for Clean Pancakes: Make sure your griddle or pan is clean. Any leftover bits from previous cooking can quickly burn and stick to your new, beautiful pancakes.
- Butter vs. Oil: Melted butter adds a richer flavor, while oil can sometimes lead to a slightly more tender pancake. Both are delicious!
Ingredient Substitutions: When Life Gives You Lemons… or Other Ingredients!
Sometimes, you might not have every single ingredient on hand, or perhaps you have dietary needs. Don’t worry! This recipe is quite forgiving. Here are a few easy swaps that work wonderfully.
| Original Ingredient | Substitution Option | Notes |
|---|---|---|
| Milk | Water, Buttermilk, or Non-Dairy Milk (Almond, Soy, Oat) | Buttermilk will add a slight tang and extra tenderness. Water works in a pinch but might make them slightly less rich. Non-dairy milks are a great vegan option. |
| Egg | Flax Egg (1 tbsp flaxseed meal + 3 tbsp water, let sit for 5 mins), Commercial Egg Replacer, or ½ small mashed banana | These are great for vegan or egg-allergy needs. Banana will add a subtle banana flavor. |
| Unsalted Butter (melted) | Vegetable Oil, Coconut Oil, or another neutral-flavored oil | Oil is a perfect 1:1 substitute and ensures a tender pancake. Coconut oil will add a hint of coconut flavor. |
| Granulated Sugar | Brown Sugar, Maple Syrup, or Honey | These will add slightly different flavors and colors. You might need to adjust the liquid slightly if using liquid sweeteners. |
| All-Purpose Flour | Whole Wheat Flour (use half whole wheat, half all-purpose for best texture) or Gluten-Free All-Purpose Flour Blend | Whole wheat can make pancakes denser. A GF blend might require slight adjustments depending on the brand. |
For guidance on food safety, especially regarding raw eggs and dairy, the U.S. Food & Drug Administration (FDA) has some helpful resources on their website, covering general food handling and storage to keep your kitchen safe and your ingredients fresh.
Troubleshooting Common Pancake Problems
Even with the simplest recipes, sometimes things don’t go exactly as planned. If you encounter any issues, don’t fret! Here’s how to fix some common pancake predicaments.
- Pancakes are Flat and Dense: This is usually due to overmixing the batter or using old baking powder. Next time, stir gently and check your baking powder’s expiry date.
- Pancakes are Burning on the Outside, Raw Inside: Your griddle is likely too hot. Turn down the heat to medium and give your pan time to cool slightly between batches if needed.
- Pancakes Sticking to the Pan: Ensure you’re using a non-stick pan and that it’s properly heated. A little extra butter or oil when you start can also help prevent sticking.
- Pancakes are Gummy or Chewy: This is another sign of overmixing. Remember, just combine until the dry ingredients are barely wet.
- Uneven Browning: Make sure the heat is even across your griddle. If one side consistently cooks faster, you may need to rotate your pan or adjust your burner.
Frequently Asked Questions (FAQ)
Got more questions swirling in your head? I’ve got answers! Here are some common queries beginners have about making pancakes.
Q1: Can I make this pancake batter ahead of time?
A1: While it’s best to use pancake batter immediately after mixing for the freshest, fluffiest results, you can refrigerate it for up to 24 hours. However, you might need to add a splash more milk and give it a gentle stir, as it can thicken considerably. The baking powder’s leavening power might also decrease slightly.
Q2: How do I make buttermilk pancakes with this recipe?
A2: To make buttermilk pancakes, simply substitute the milk with an equal amount of buttermilk. If you don’t have buttermilk, you can make a quick substitute: add 1 tablespoon of lemon juice or white vinegar to a measuring cup, then fill it with milk to the ¾ cup line. Let it sit for 5-10 minutes until it slightly curdles before using.
Q3: What can I add to my pancake batter for extra flavor?
A3: You can add about ¼ cup of mix-ins to the batter just before cooking. Popular choices include fresh blueberries, chocolate chips, chopped nuts, or a sprinkle of cinnamon and nutmeg for a warming spice blend. For a touch of citrusy freshness, add a teaspoon of lemon or orange zest.
Q4: My pancakes aren’t very fluffy. What did I do wrong?
A4: The most common culprits are old baking powder or overmixing. Ensure your baking powder is fresh (fizzes in hot water). When mixing, stir only until the dry ingredients are just incorporated; lumps are okay! Don’t beat the batter vigorously.
Q5: How many pancakes does this 1-cup flour recipe make?
A5: This recipe typically yields about 6-8 pancakes, depending on the size you pour them. Using a ¼ cup measure for each pancake is a good way to get consistent results and a yield of around 6 pancakes.
Q6: Can I freeze leftover pancake batter?
A6: Yes, you can freeze pancake batter. Pour it into a freezer-safe container or a freezer bag, leaving some headspace for expansion. Thaw it in the refrigerator overnight and give it a good whisk before using. Keep in mind that the fluffiness might be slightly reduced compared to freshly made batter.
Beyond the Basics: Getting Creative with Your Pancakes
Now that you’ve mastered the basic 1-cup flour pancake recipe, the fun can truly begin! Think of this recipe as your launching pad for endless breakfast adventures.
Are you craving something fruity? Gently fold in a handful of fresh berries or toss in some chopped banana slices before cooking. For a bit of decadence, stir in mini chocolate chips or a sprinkle of cinnamon and nutmeg into the batter. A touch of lemon or orange zest can add a lovely brightness!
You can also play with your toppings! Beyond syrup and butter, try a dollop of Greek yogurt with jam, a sprinkle of toasted nuts, or a dusting of powdered sugar. Remember that the U.S. Department of Agriculture (USDA) offers great guidance on safe food storage if you have leftover ingredients that need to be kept fresh.
A Final Word on Your Pancake Journey
See? Making delicious, fluffy pancakes from scratch with just a cup of flour is totally achievable and incredibly rewarding. You’ve learned the simple steps, discovered some handy tips, and even looked at how to swap ingredients. This is the magic of home cooking – taking basic ingredients and turning them into something wonderful.
Don’t be afraid to experiment and make this recipe your own. Every pancake you flip, every batter you mix, is a step forward. Cooking is a journey, and with simple, reliable recipes like this one, you’re well on your way to becoming a kitchen confident cook. So gather your few ingredients, enjoy the process, and savor those delightful, homemade pancakes!

Henry is the creator of CookCanvas, where home cooking meets creativity. With a passion for making food simple and enjoyable, he helps beginners and busy families cook confidently at home. Through easy tutorials, time-saving tips, and practical recipes, Henry turns everyday ingredients into delicious, stress-free meals anyone can make.
When he’s not testing new recipes, you’ll find him exploring local markets, photographing food, and sharing kitchen wisdom that inspires confidence in every cook.