Ragi pancake recipe for a healthy and delicious breakfast! This simple guide shows you how to make fluffy, flavorful ragi pancakes that are easy for beginners and packed with nutrients.
Ragi Pancake Recipe: Amazing Flavor!
Welcome to CookCanvas, where we make kitchen adventures simple and fun! Ever feel like breakfast needs a little more… well, oomph? Something healthy, tasty, and easy to whip up on a busy morning? That’s where ragi pancakes come in! Many home cooks find themselves searching for nutritious breakfast options that don’t require a culinary degree or a pantry full of exotic ingredients. The good news is, you’ve come to the right place! We’re going to walk through a super simple ragi pancake recipe that’s incredibly forgiving and bursting with amazing flavor. Get ready to discover your new favorite breakfast staple!
Why Choose Ragi? A Nutritional Powerhouse
Ragi, also known as finger millet, is an ancient grain that’s making a big comeback, and for good reason! It’s a fantastic source of calcium, fiber, and essential amino acids, making it a superfood that’s both delicious and incredibly good for you. Unlike refined flours, ragi offers sustained energy release, keeping you feeling full and satisfied for longer. It’s also naturally gluten-free, which is a huge plus for many people.
For those new to cooking or trying to incorporate healthier options into their diet, ragi might seem a little unfamiliar. But trust me, it’s wonderfully versatile and easy to work with. We’ll show you just how simple it is to transform this humble grain into fluffy, delicious pancakes that everyone will love.
Getting Started: What You’ll Need
Before we dive into the mixing, let’s gather our ingredients and tools. Having everything ready makes the cooking process so much smoother, and it’s a great habit for any home cook to develop! It’s like setting up your little cooking station, making sure you have all your art supplies before you start painting.
Ingredients for Amazing Ragi Pancakes
Here’s what you’ll need to make a batch of these delightful ragi pancakes. We’re keeping it simple, so you likely have most of these in your pantry already!
- 1 cup Ragi Flour (Finger Millet Flour)
- 1/2 cup All-Purpose Flour (or whole wheat flour for a healthier option)
- 1 tablespoon Sugar (adjust to your preference)
- 1 teaspoon Baking Powder
- 1/2 teaspoon Baking Soda
- 1/4 teaspoon Salt
- 1 large Egg
- 1 1/4 cups Milk (any kind works)
- 2 tablespoons Melted Butter or Vegetable Oil (plus extra for greasing the pan)
- 1 teaspoon Vanilla Extract (optional, but adds great flavor!)
Essential Kitchen Tools
You don’t need fancy gadgets for this recipe. Just the basics will do!
- Large Mixing Bowl
- Whisk
- Measuring Cups and Spoons
- Non-stick Frying Pan or Griddle
- Spatula
- Ladle or Large Spoon
Step-by-Step: Crafting Your Delicious Ragi Pancakes
Now for the fun part – making the pancakes! We’ll break this down into easy steps so you can follow along with confidence. Remember, cooking is all about enjoying the process, so take your time and have fun with it!
Step 1: Combine Dry Ingredients
In your large mixing bowl, add the ragi flour, all-purpose flour (or whole wheat), sugar, baking powder, baking soda, and salt. Give them a good whisk to combine everything evenly. This ensures your leavening agents are well distributed, leading to fluffier pancakes.
Step 2: Whisk Wet Ingredients
In a separate smaller bowl or in a well in the center of your dry ingredients, whisk the egg. Then, gradually whisk in the milk, melted butter (or oil), and vanilla extract (if using). It’s okay if the mixture looks a little lumpy at this stage; we don’t want to overmix.
Step 3: Combine Wet and Dry Mixtures
Pour the wet ingredients into the bowl with the dry ingredients. Gently whisk everything together until just combined. A few small lumps are perfectly fine! Overmixing can lead to tough pancakes, so stop as soon as you don’t see any large dry patches of flour.
Step 4: Rest the Batter (Optional, but Recommended!)
For even fluffier pancakes, let the batter rest for about 5-10 minutes. This allows the gluten to relax and the baking powder to start working its magic. It’s a little trick that makes a big difference in texture!
Step 5: Heat Your Pan
Place your non-stick frying pan or griddle over medium heat. Add a little butter or oil to lightly grease the surface. You know it’s ready when a drop of water sizzles and evaporates quickly.
Step 6: Cook the Pancakes
Using a ladle or a large spoon, pour about 1/4 cup of batter onto the hot pan for each pancake. Cook for 2-3 minutes on the first side, or until you see small bubbles forming on the surface and the edges look set.
Step 7: Flip and Cook the Other Side
Carefully flip the pancake with your spatula. Cook for another 1-2 minutes on the second side, until golden brown and cooked through. Repeat with the remaining batter, adding a little more butter or oil to the pan as needed between batches.
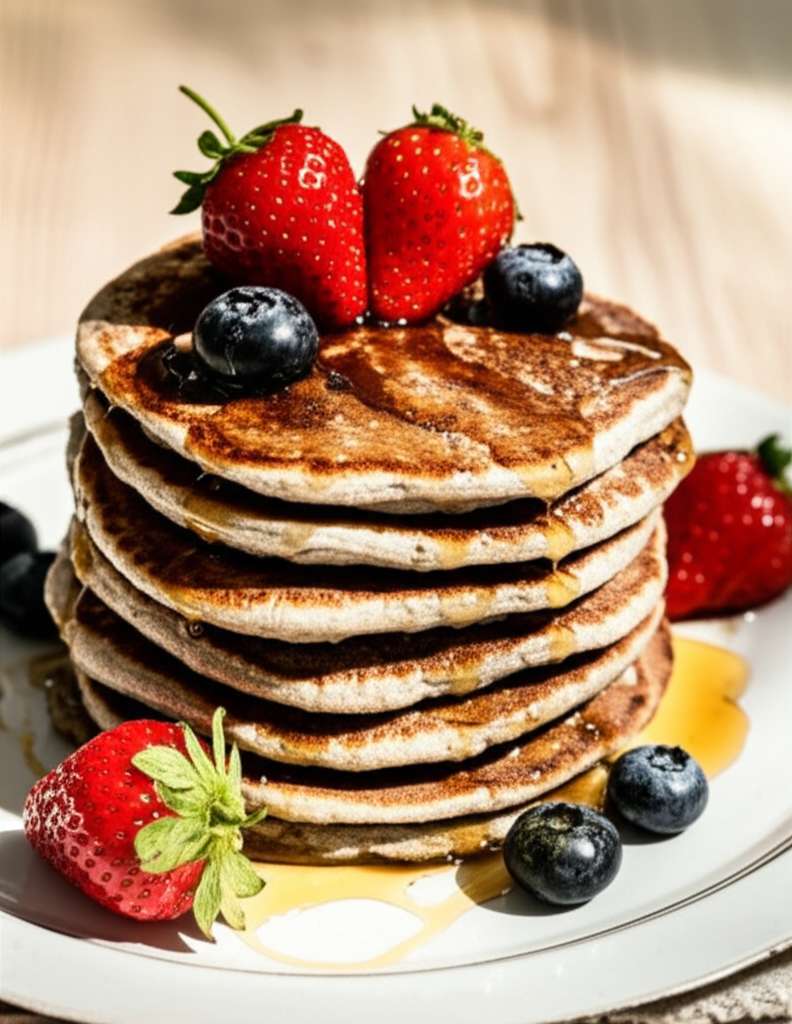
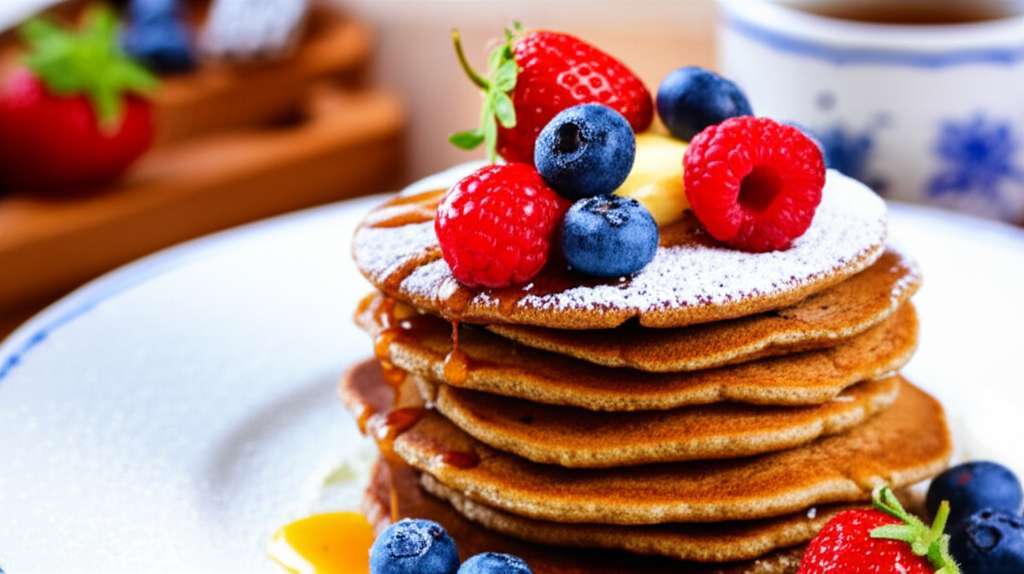
Step 8: Serve and Enjoy!
Serve your warm ragi pancakes immediately with your favorite toppings! Think fresh berries, a drizzle of honey or maple syrup, a dollop of yogurt, or even some chopped nuts. They are absolutely delicious fresh off the griddle.
Tips for Perfect Ragi Pancakes Every Time
Even beginners can achieve pancake perfection with a few key tips. These little nuggets of wisdom will help you master this recipe and feel more confident in the kitchen.
Don’t Overmix: This is probably the most crucial tip for light and fluffy pancakes. A few lumps are good!
Medium Heat is Key: Too high, and the outside burns before the inside cooks. Too low, and they won’t get golden and fluffy.
Test Your First Pancake: The first pancake is often a test run. Use it to adjust your heat and batter consistency.
Ragi Flour Texture: Ragi flour can sometimes be a bit coarser than wheat flour. If you prefer a super smooth batter, you can lightly grind the ragi seeds before making flour, or use a fine-milled ragi flour.
Adjust Sweetness: Taste your batter (before adding the egg, if you’re concerned about raw egg consumption) or adjust the sugar to your liking.
Ragi Pancake Variations to Explore
Once you’ve mastered the basic ragi pancake recipe, why not have some fun and experiment? Adding a few extra ingredients can transform your pancakes and introduce new flavors and textures.
Flavor Boosters
Spices: Add a pinch of cinnamon, cardamom, or nutmeg to the dry ingredients for a warm, cozy flavor.
Citrus Zest: A little lemon or orange zest can add a bright, refreshing note.
Chocolate Chips: Fold in a handful of mini chocolate chips for a decadent treat.
Fruit: Mash half a banana into the batter or stir in some fresh blueberries for natural sweetness and flavor.
Dairy-Free & Vegan Options
Making your ragi pancakes vegan is surprisingly simple!
- Milk: Use your favorite plant-based milk like almond, soy, oat, or coconut milk.
- Egg Substitute: For binding, you can use a flax egg (1 tablespoon flaxseed meal + 3 tablespoons water, let sit for 5 minutes) or a commercial egg replacer.
- Butter: Use vegetable oil or a dairy-free butter alternative.
Ragi Pancake vs. Traditional Pancakes: A Quick Comparison
While both are delicious, understanding the differences can help you choose what’s best for your needs.
| Feature | Ragi Pancakes | Traditional Pancakes (Wheat Flour) |
|---|---|---|
| Primary Flour | Ragi (Finger Millet) | Wheat Flour |
| Gluten Content | Gluten-Free | Contains Gluten |
| Nutrient Profile | Rich in Calcium, Iron, Fiber, Amino Acids | Good source of Carbohydrates, some Fiber and Protein |
| Digestibility | Easier to digest for some people, good for sustained energy | Can be harder to digest for those with gluten sensitivities |
| Flavor Profile | Slightly nutty, earthy undertones | Mild, neutral flavor |
| Texture | Can be slightly denser if not prepared correctly, but can be made very fluffy | Generally very fluffy and light |
For those looking for a more nutrient-dense and gluten-free option, ragi pancakes are an excellent choice. They offer a unique flavor and a nutritional boost that traditional pancakes don’t quite match.
Troubleshooting Common Ragi Pancake Issues
Don’t worry if your first attempt isn’t perfect! Every cook has kitchen mishaps. Here are some common issues and how to solve them.
Pancakes are too flat/dense: You might have overmixed the batter, or your baking powder/soda might be old. Try resting the batter longer next time or check the expiry dates on your leavening agents.
Pancakes are sticking to the pan: Ensure your pan is properly heated and greased. A non-stick pan is a great investment for pancake success!
Pancakes are burning on the outside, raw inside: Your heat is too high. Lower it to medium and allow more time for the inside to cook through.
* Ragi flour taste is too strong: This can happen if you’re not used to the flavor. Try using a mix of ragi and wheat flour, or add more flavor enhancers like vanilla, cinnamon, or fruit. You can also try using a finer grind of ragi flour.
Frequently Asked Questions About Ragi Pancakes
Here are some common questions beginners have about making ragi pancakes.
- Can I make ragi pancakes without eggs?
- Absolutely! You can use a flax egg (1 tablespoon flaxseed meal mixed with 3 tablespoons water, let it sit for 5 minutes) or a commercial egg replacer. You can also sometimes get away with just the milk and other wet ingredients, especially if you ensure your baking soda is active.
- How do I store leftover ragi pancake batter?
- Ragi pancake batter is best used fresh, but you can store it in an airtight container in the refrigerator for up to 24 hours. You might need to give it a gentle stir before cooking, and it might not rise quite as much. It’s always best to make only what you’ll use.
- Can I make ragi pancakes ahead of time and reheat them?
- Yes, you can! Once cooled, store leftover pancakes in an airtight container or a resealable bag in the refrigerator for up to 2-3 days. Reheat them gently in a toaster, oven, or microwave until warm.
- Is ragi flour gluten-free?
- Yes, ragi flour is naturally gluten-free. This makes it a fantastic alternative for individuals with celiac disease or gluten sensitivity. However, always check the packaging to ensure it’s not processed in a facility that also handles gluten to avoid cross-contamination if this is a concern for you.
- What’s the best way to get fluffy ragi pancakes?
- To ensure fluffiness, don’t overmix the batter, use fresh baking powder and baking soda, and let the batter rest for a few minutes before cooking. Cooking on medium heat and flipping only once also helps maintain their structure and fluffiness.
- Can I use other flours with ragi?
- Certainly! Many people enjoy a blend of ragi with other flours like whole wheat, all-purpose, or even oat flour. Experimenting with ratios can help you find your preferred taste and texture. A 1:1 ratio with whole wheat is a great starting point.
- Where can I learn more about the nutritional benefits of ragi?
- For detailed information on the nutritional aspects of ragi, you can refer to resources like the USDA FoodData Central, which provides comprehensive data on its nutrient content. Many health and nutrition websites also offer insights into the benefits of incorporating millets into your diet.
Conclusion: Your Ragi Pancake Journey Begins!
And there you have it – your very own ragi pancake recipe, ready to bring amazing flavor and wholesome goodness to your breakfast table! You’ve learned how to mix the batter, cook them to golden perfection, and even explore fun variations. Remember, cooking is a journey of discovery, and this ragi pancake recipe is a wonderful place to start. Feel empowered to experiment with toppings, try different flour blends, and make these pancakes your own.
Don’t be afraid to try new things in the kitchen. Each attempt is a chance to learn and grow, and with this simple recipe, you’re already on your way to creating delicious, homemade meals with confidence. So, gather your ingredients, put on your favorite apron, and let the joyful process of cooking begin. Happy cooking from CookCanvas!