Make breakfast a breeze with this easy recipe for overnight pancake casserole! Prepare it the night before for a delicious, fluffy, and stress-free morning meal that everyone will love.
Waking up to the smell of pancakes is a dream for many, but the morning rush can make it a challenge. You might be thinking that making pancakes from scratch every morning is too much work, or that box mixes just don’t taste as good. It’s a common dilemma for busy home cooks who crave a comforting breakfast but need it to be practical.

Don’t worry, there’s a wonderful solution that combines the joy of pancakes with the convenience of make-ahead magic! This recipe for overnight pancake casserole is designed to be incredibly simple, even if you’re new to the kitchen. We’ll guide you through each step, showing you how to create a delicious breakfast that’s ready when you are.
Get ready to discover a breakfast game-changer that will transform your mornings. We’ll cover everything from gathering your ingredients to assembling the casserole and what to expect when you bake it. Let’s dive in and make mornings delicious and easy!
What is Overnight Pancake Casserole?
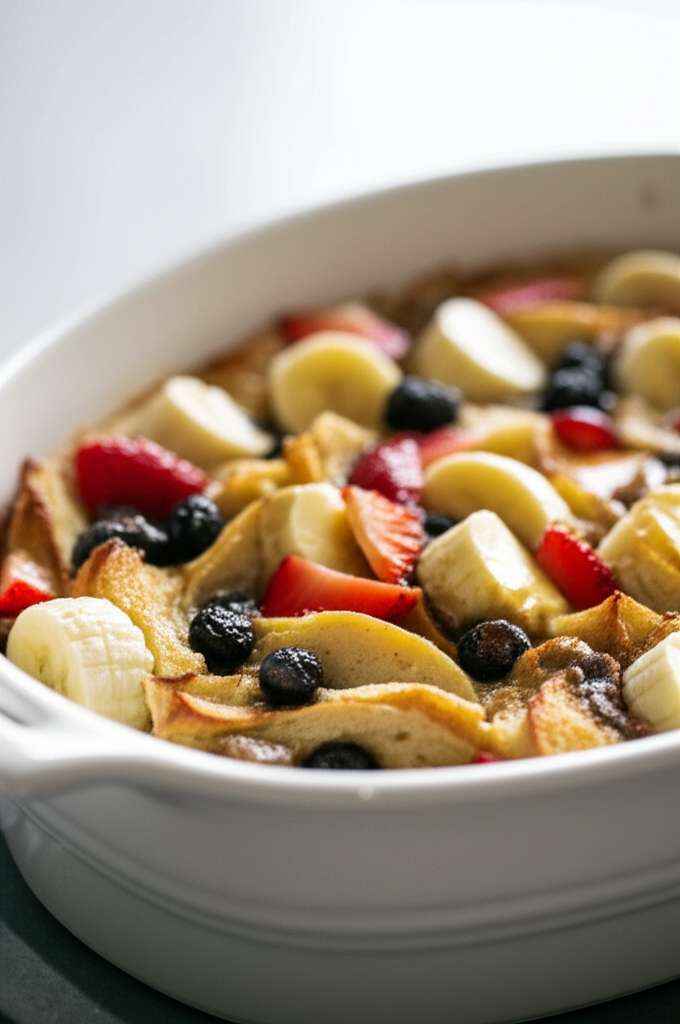
Overnight pancake casserole is a clever twist on traditional pancakes, baked together in one dish. Instead of cooking individual pancakes on a griddle, you mix your pancake batter with tasty additions and pour it into a baking dish. Then, you let it chill in the refrigerator overnight.
When you wake up, all you have to do is pop it in the oven for a warm, fluffy, and perfectly cooked breakfast. It’s the ultimate solution for busy mornings, offering all the comforting flavors of pancakes without the fuss of standing over a hot stove. This method makes cleanup a breeze too, with just one pan to wash!
Why You’ll Love This Recipe
This overnight pancake casserole is a true hero for busy mornings. It’s incredibly forgiving, meaning even beginner cooks can achieve fantastic results. The make-ahead aspect is a lifesaver, saving you precious time and effort when you’re rushing to get out the door.
Plus, it’s wonderfully versatile. You can customize it with your favorite fruits, chocolate chips, or nuts, making it a breakfast that never gets boring. It’s a comforting, crowd-pleasing dish that feels like a special treat but is surprisingly easy to make.
Ingredients You’ll Need
Gathering your ingredients is the first step to pancake casserole success. This recipe uses simple, pantry-staple items that most kitchens already have on hand. Having everything ready makes the assembly process smooth and enjoyable.
- 2 cups all-purpose flour
- 2 tablespoons granulated sugar
- 2 teaspoons baking powder
- 1/2 teaspoon salt
- 1/4 teaspoon cinnamon (optional, but adds a lovely warmth)
- 2 large eggs
- 2 cups milk (any kind works!)
- 1/4 cup melted unsalted butter, plus extra for greasing
- 1 teaspoon vanilla extract
- Optional Mix-ins: 1 cup fresh or frozen berries, chocolate chips, chopped nuts, or diced apples
Essential Kitchen Tools
You don’t need a lot of fancy gadgets for this recipe. Most of these items are likely already in your kitchen drawers and cupboards. Having the right tools makes cooking much simpler and more enjoyable.
- Large mixing bowl
- Whisk
- Measuring cups and spoons
- 9×13 inch baking dish
- Spatula or spoon for mixing
- Oven mitts
Step-by-Step Guide to Your Overnight Pancake Casserole
Let’s get started on creating your delicious overnight pancake casserole! Follow these simple steps, and you’ll have a fantastic breakfast ready to go. We’ll break it down into easy-to-manage parts, so you feel confident at every stage.
Step 1: Prepare Your Baking Dish
First things first, grab your 9×13 inch baking dish. Generously grease the inside of the dish with butter or cooking spray. This is a super important step to ensure your casserole doesn’t stick, making for easy serving and cleanup.
A good coating of butter or spray means your beautiful pancake casserole will slide right out when it’s done. Don’t skimp on this part – a little extra greasing goes a long way!
Step 2: Mix the Dry Ingredients
In your large mixing bowl, add the flour, granulated sugar, baking powder, salt, and cinnamon (if you’re using it). Whisk these dry ingredients together until they are well combined. This ensures that your baking powder and salt are evenly distributed, leading to perfectly fluffy pancakes.
Whisking also helps to aerate the flour a bit, which can contribute to a lighter texture in your final casserole. Make sure there are no big clumps of flour or baking powder.
Step 3: Add the Wet Ingredients
Now, it’s time to add the wet ingredients to the dry. Crack the two large eggs into the bowl. Pour in the milk, the melted butter (make sure it’s not too hot!), and the vanilla extract. Vanilla extract adds a wonderful aroma and flavor that complements the pancakes beautifully.
Gently whisk everything together until just combined. It’s okay if there are a few small lumps; overmixing can lead to tough pancakes. We’re aiming for a smooth, pourable batter, similar to what you’d make for regular pancakes.
Step 4: Incorporate Your Mix-Ins
This is where you can get creative! If you’re using berries, chocolate chips, nuts, or diced apples, gently fold them into the batter now. If you’re using frozen berries, you can add them straight from the freezer; they’ll thaw overnight.
Be careful not to stir too vigorously when adding your mix-ins. A gentle fold ensures they are distributed throughout the batter without breaking apart, especially if you’re using delicate fruits like raspberries.
Step 5: Pour and Chill
Pour the entire batter mixture evenly into your prepared baking dish. Smooth the top slightly with your spatula or spoon. Cover the baking dish tightly with plastic wrap or a lid.
Now, the magic happens overnight! Place the covered dish in the refrigerator. Letting it rest overnight allows the flavors to meld and the baking powder to start its work, promising a delightful texture in the morning.
Step 6: Bake to Perfection
In the morning, preheat your oven to 375°F (190°C). Remove the plastic wrap from the casserole dish. Place the dish on a baking sheet (to catch any potential drips) and bake for 30-40 minutes.
You’ll know it’s ready when the casserole is puffed up, golden brown around the edges, and a toothpick inserted into the center comes out clean. The exact baking time can vary slightly depending on your oven and the mix-ins you’ve used.
Step 7: Serve and Enjoy
Once baked, carefully remove the casserole from the oven using oven mitts. Let it cool for a few minutes before serving. This allows it to set up a bit more, making it easier to cut and serve.
Serve warm squares of your delicious overnight pancake casserole with your favorite toppings like maple syrup, fresh fruit, whipped cream, or a dusting of powdered sugar. It’s a wonderful way to start any day!
Baking Temperature and Time Guide
Getting the baking temperature and time just right is key to a perfectly cooked pancake casserole. While this recipe provides a standard guideline, ovens can vary. It’s always a good idea to keep an eye on your casserole, especially the first time you make it.
The temperature of 375°F (190°C) allows the casserole to cook through evenly without burning the edges. The baking time of 30-40 minutes is an estimate; the visual cues are your best indicators for doneness.
| Oven Temperature | Estimated Baking Time | Signs of Doneness |
|---|---|---|
| 375°F (190°C) | 30-40 minutes | Puffed, golden brown, toothpick inserted comes out clean |
Ingredient Substitutions and Variations
The beauty of this overnight pancake casserole lies in its adaptability. Don’t have a specific ingredient? No problem! Here are some common substitutions and popular variations to help you customize your casserole.
Feel free to experiment and make this recipe your own. Whether you’re catering to dietary needs or simply want to try new flavors, there are plenty of options.
| Ingredient | Substitution/Variation | Notes |
|---|---|---|
| All-purpose flour | Whole wheat flour, gluten-free flour blend | May alter texture slightly; use a blend designed for baking. |
| Milk | Almond milk, soy milk, oat milk, buttermilk | Any liquid will work; buttermilk can add a slight tang. |
| Butter | Vegetable oil, melted coconut oil | Ensure it’s melted and cooled slightly. |
| Granulated sugar | Brown sugar, maple syrup (adjust liquid slightly if using syrup) | Brown sugar adds a caramel note. |
| Eggs | Flax eggs (2 tbsp flax meal + 6 tbsp water, let sit 5 min) | For a vegan option; may result in a denser texture. |
| Plain Batter | Lemon zest, almond extract, gingerbread spices | Add to dry ingredients for flavor infusion. |
| Fresh Berries | Frozen berries, sliced bananas, diced peaches, cooked apple chunks | Adjust baking time slightly if using very wet fruits. |
| Chocolate Chips | White chocolate chips, butterscotch chips, chopped nuts (pecans, walnuts) | Great for a dessert-like breakfast treat. |
Maximizing Flavor and Texture
To ensure your overnight pancake casserole is as delicious as possible, a few extra tips can make a big difference. Paying attention to small details can elevate your breakfast from good to truly amazing.
The overnight rest is crucial for developing flavor and texture. It allows the flour to fully hydrate, resulting in a more tender crumb. Don’t skip this step if you want the best results!
- Don’t Overmix: Overmixing the batter develops gluten, which can lead to tough, chewy pancakes. Mix until just combined.
- Rest is Best: The overnight chill is not just for convenience; it allows the baking powder to activate and the flavors to meld.
- Butter is Your Friend: Properly greasing the baking dish is essential to prevent sticking and ensure easy serving.
- Watch for Doneness: Ovens vary. Use the toothpick test and visual cues (golden brown, puffed up) to determine when it’s ready.
- Room Temperature Ingredients: While not strictly necessary for this recipe, using room temperature eggs and milk can help ingredients combine more smoothly.
Food Safety Considerations
When preparing make-ahead meals like this overnight pancake casserole, it’s important to be mindful of food safety. Proper handling and storage help prevent the growth of harmful bacteria and ensure your meal is safe to eat.
The USDA’s Food Safety and Inspection Service provides excellent guidelines for storing and handling perishable foods. Always ensure your refrigerator is at the correct temperature to keep food safe.
- Refrigeration Temperature: Your refrigerator should be set at or below 40°F (4°C). This temperature significantly slows the growth of most harmful bacteria.
- Covering Properly: Always cover your casserole tightly with plastic wrap or a lid before refrigerating. This prevents cross-contamination from other foods in the fridge and keeps the batter fresh.
- Cooking Thoroughly: Baking the casserole at the recommended temperature and for the correct duration ensures that any potential bacteria are killed. The toothpick test is a good indicator of thorough cooking.
- Leftovers: If you have leftovers, refrigerate them within two hours of baking. They can be stored in an airtight container for up to 3-4 days. Reheat thoroughly before serving.
- Raw Eggs: Be aware that this recipe contains raw eggs. While the overnight chilling is generally safe for baked goods, individuals with compromised immune systems, pregnant women, young children, or older adults should consider using pasteurized eggs or opting for a fully cooked pancake recipe.
Frequently Asked Questions About Overnight Pancake Casserole
Got questions? We’ve got answers! Here are some common queries from beginner cooks about making overnight pancake casserole. These tips should help you troubleshoot or customize your recipe with confidence.
Q1: Can I make this in individual muffin tins?
Yes, you absolutely can! Grease or line a muffin tin with paper liners. Fill each cup about two-thirds full with the batter. You’ll likely need to reduce the baking time, so start checking around 18-22 minutes. They should be puffed and golden.
Q2: My batter seems too thick or too thin, what should I do?
If the batter is too thick, add a tablespoon or two more milk until it reaches a pourable consistency. If it’s too thin, whisk in a tablespoon or two more flour. Remember that the batter will thicken slightly as it rests in the fridge.
Q3: Can I freeze the baked casserole?
Yes, you can! Let the baked casserole cool completely. Cut it into individual portions, wrap each portion tightly in plastic wrap, and then place them in a freezer-safe bag or container. To reheat, you can thaw overnight in the refrigerator and then warm in the oven or microwave, or reheat directly from frozen in a moderate oven (around 350°F/175°C) until heated through.
Q4: How long can I store the uncooked batter in the fridge?
The batter is best used within 24 hours of making it. While it might still be usable for a day or two longer, the leavening agents (baking powder) will lose their potency over time, and the texture may not be as light and fluffy. For the best results, plan to bake it the morning after you prepare it.
Q5: What if I don’t have baking powder?
Baking powder is essential for the fluffiness of pancakes. If you don’t have any, you can try using 1/2 teaspoon of baking soda combined with 1 teaspoon of cream of tartar. However, baking powder is specifically formulated for this type of recipe, so it’s best to use it if possible. Without a leavening agent, your casserole will be flat and dense.
Q6: Can I make this dairy-free?
Absolutely! To make this recipe dairy-free, simply use your favorite dairy-free milk (like almond, soy, oat, or cashew milk) and a dairy-free butter substitute or a neutral oil like vegetable or canola oil. Ensure any mix-ins like chocolate chips are also dairy-free.
Q7: My casserole came out a little gummy, what went wrong?
A gummy texture often means the casserole wasn’t cooked thoroughly or was slightly overmixed. Ensure you bake it until a toothpick comes out clean. Also, try to mix the batter only until the ingredients are just combined; overmixing can lead to a dense, gummy result.
Conclusion: Your Effortless, Amazing Breakfast Awaits!
There you have it – a foolproof guide to creating a delicious overnight pancake casserole! You’ve learned how simple it is to mix up the batter, customize it with your favorite flavors, and let it work its magic overnight in the fridge.
This recipe is designed to bring joy and ease to your mornings. It’s a testament to how a little preparation can lead to a truly rewarding breakfast experience. So go ahead, give it a try, and savor those stress-free mornings filled with the comforting aroma and taste of homemade pancakes.
You’ve got this! Enjoy your amazing breakfast!